In our earlier article about Macintosh project creator Jef Raskin, we looked at his quest for the humane computer, one that was efficient, consistent, useful, and above all else, respectful and adaptable to the natural frailties of humans. From Raskin’s early work on the Apple Macintosh to the Canon Cat and later his unique software implementations, you were guaranteed an interface you could sit down and interact with nearly instantly and—once you’d learned some basic keystrokes and rules—one you could be rapidly productive with.
But no modern computer implements his designs directly, even though some are based on principles he either espoused or outright pioneered. Fortunately, with a little work and the magic of emulation, you can have your very own humane interface at home and see for yourself what computing might have been had we traveled a little further down Raskin’s UI road.
You don’t need to feed a virtual Cat
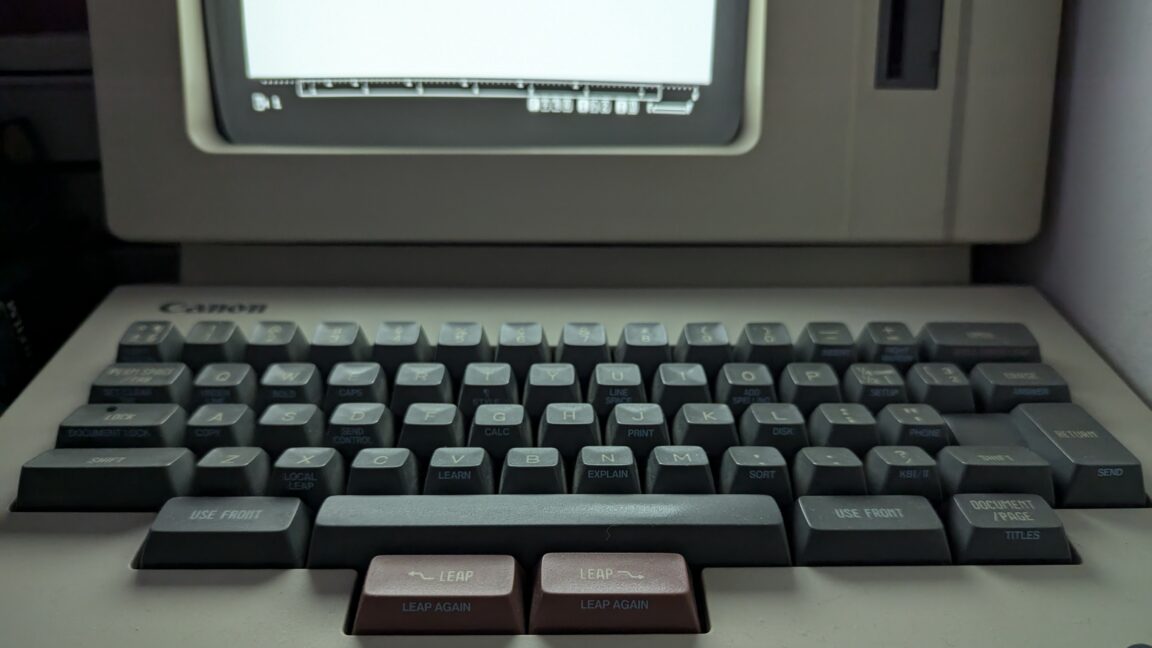
Perhaps the most straightforward of Raskin’s systems to emulate is the Canon Cat. Sold by Canon as an overgrown word processor (billed as a “work processor”), it purported to be a simple editor for office work but is actually a full Motorola 68000-based computer programmable through an intentional backdoor in its own dialect of Forth. It uses a single workspace saved en masse to floppy disk that can be subdivided into multiple “documents” and jumped to quickly with key combinations, and it includes facilities for simple spreadsheets and lists.
The Cat is certainly Jef Raskin’s most famous system after the early Macintosh, and it’s most notable for its exclusive use of the keyboard for interaction—there is no mouse or pointing device of any kind. It is supported by MAME, the well-known multi-system emulator, using ROMs available from the Internet Archive.
Note that the MAME driver for the Canon Cat is presently incomplete;
it doesn’t support a floppy drive or floppy disk images, and it doesn’t support the machine’s built-in serial port. Still, this is more than enough to get the flavor of how it operates, and the Internet Archive manual includes copious documentation.
There is also a MAME bug with the Cat’s beeper where if the emulated Cat makes a beep (or at least attempts to), it will freeze until it’s reset. To work around that, you need to make the Cat not beep, which requires a trip to its setup screen. On most systems, the Cat USE FRONT key is mapped to Control, and the Cat’s two famous pink LEAP keys are mapped to Alt or Option. Hold down USE FRONT and press the left brace key, which is mapped to SETUP, then release SETUP but keep USE FRONT/Control down.
The first screen appears;
we want the second, so tap SETUP again with USE FRONT/Control still down. Now, with USE FRONT/Control still down, tap the space bar repeatedly to cycle through the options until it gets to the “Problem signal” option, and with USE FRONT/Control still down, tap one of the LEAP keys until it is set to “Flash” (i.e., no beep option). For style points, do the same basic operations to set the keyboard type to ASCII, which works better in MAME. When you’re all done, now you can release USE FRONT and experiment.
Getting around with the Cat requires knowing which keys do what, though once you’ve learned that, they never change. To enter text, just type. There are no cursor keys and no mouse;
all motion is by leaping—that is, holding down either LEAP key and typing something to search for. Single taps of either LEAP key “creep” you forward or back by a single character.
Special control sequences are executed by holding down USE FRONT and pressing one of the keys marked with a blue function (like we did for the setup menu). The most important of these is USE FRONT-HELP (the N key), which explains errors when the Cat “beeps” (here, flashes its screen), or if you release the N key but keep USE FRONT down, you can press another key to find out what it does.
You can also break into the hidden Forth interpreter by typing Enable Forth Language, highlighting it (i.e., immediately press both LEAP keys together) and then evaluating it with USE FRONT-ANSWER (not CALC;
usually Control-Backspace in MAME). You’ll get a Forth ok prompt, and the system is now yours. Remember, it’s Forth, and Forth has dragons. Reset the Cat or type re to return to the editor. With Forth on, you can also highlight Forth in your document and press USE FRONT-ANSWER to execute it and place the answer in your document.
The Internet Archive page has full documentation, and the Cat’s manual is easy to follow, but sadly, the MAME driver doesn’t yet offer you a way to save your document to disk or upload it somewhere.
A SwyftCard shows you swyftcare
Prior to the Cat’s development, however, Raskin’s backers had prevailed upon the company to release some aspects of the technology to raise cash, and as we discussed in the prior article, this initiative yielded the SwyftCard for the Apple IIe. The SwyftCard, like the later Cat, uses an editor on a single subdivided workspace as the core interface, but unlike the Cat, it was openly programmable, including in Applesoft BASIC. It also defines LEAP and USE FRONT keys (and stickers to mark them) and features an exclusively keyboard-driven interface. Being a relatively simple card and floppy disk combination, the package is not particularly difficult to reproduce, and some users have created clone cards with EPROMs and banking logic as historical re-creations.
That said, nowadays, the simplest means of experimenting with a SwyftCard is by using a software implementation developed by Eric Rangell for KansasFest 2021. This version loads the contents of the original 16K EPROM into high auxiliary RAM not used by the SwyftCard firmware and executes it from there. It is effectively a modern equivalent of the SwyftDisk, a software-only version IAI later sold for the Apple IIc that lacks additional expansion slots.
You can download Rangell’s software with ready-to-use disk images and media assets from the Internet Archive, with the user manual available separately. It should work in most Apple IIe emulators with at most minor adjustments; here, I tested it with Mariani, a macOS port of AppleWin, and Virtual ][. Make sure your emulator is configured for a IIe (enhanced is recommended) with an 80-column card and at least one floppy controller and drive in the standard slot 6. It should work with a IIc as well, but as of this writing, it does not work with the IIgs or II+. Also make sure you are running the system at Apple’s standard ~1MHz clock speed, as the software is somewhat timing-sensitive.
Start the emulated IIe with the disk image named SwyftCardResurrected.do. This is a standard ProDOS disk used to load the ROM’s contents into memory. At the menu, select option 1, and the SwyftCard ROM image will load from disk. When prompted, unmount the first disk image and change to the one named SwyftWare_-_SwyftCard_Tutorial.woz and then press RETURN. These disk images are based on the IIe build 1066; later versions of SwyftWare to at least 1131 are known.
The SwyftCard and SwyftDisk both came with a set of sticky labels to apply to your keys, marking the two LEAP keys (Open and Closed Apple), ESCape, LEAP AGAIN (TAB), USE FRONT (Control), and then the five functions accessed by USE FRONT: INSERT (A), SEND (D), CALC (G), DISK (L) and PRINT (N). In Mariani, Open Apple and Closed Apple map to Left and Right Option, which are LEAP BACK and LEAP FORWARD, respectively. In Virtual ][, press F5 to pass the Command key through to the emulated Apple, then use either Command as LEAP BACK and either Option as LEAP FORWARD. For regular AppleWin on a PC keyboard, use the Windows keys. All of these emulators use Control for USE FRONT.
The tutorial begins by orienting you to the LEAP keys (i.e., the two Apple keys) and how to get around in the document. Unlike the original Swyft, the Apple II SwyftCard does not use the bitmap display and appears strictly in 80-column non-proportional text.
The bar at the top contains the page number, which starts at zero. Equals signs show explicitly entered hard page breaks using the ESCape key, which serve as “subdocuments.” Hard breaks may make pages as short as you desire, but after 54 printed lines, the editor will automatically insert a soft page break with dashes instead. Although up to 200 pages were supported, in practice, the available workspace limits you to about 15 or 20, “densely typed.”
You can jump to each of the help screens either directly by number (hold down the appropriate LEAP key and type the number, then release the keys) or by holding down the LEAP key, pressing the equals sign three times, and releasing the keys. These key combinations search forward and backward for the text you entered. Once you’ve leaped once, you can LEAP AGAIN in either direction to the next occurrence by holding down the appropriate LEAP key and pressing the TAB key.
You can of course leap to any arbitrary text in either direction as well, but you can also leap to the next or prior hard page break (subdocument) by holding down LEAP and pressing ESC, or even leap to hard line breaks with LEAP and RETURN. Raskin was explicit that the keys be released after the operation as a mental reminder that you are no longer leaping, so make sure to release all keys fully before your next leap.
You can also creep forward with the LEAP keys by single characters each time they are pressed.
Swyft and the SwyftCard implemented a two-phased cursor, which the SwyftCard calls either “wide” or “narrow.” By default, the cursor is “narrow,” alternating between a solid and a partially filled block. As you type, the cursor splits into a “wide” form—any text shown in inverse, usually the last character you entered, is what is removed when you press DELETE (Mariani doesn’t seem to implement this fully, but it works in Virtual ][ and standard AppleWin), with the blinking portion after the inverse text indicating the insertion point. When you creep or leap, the cursor merges back into the “narrow” form. When narrow, DELETE deletes right as a true delete instead of a backspace.
If you press both LEAP keys together, they will select a range. If you were typing text, then what you just typed becomes selected. Since it appears in inverse, DELETE will remove it. You can also select a previous range by LEAPing to the beginning, LEAPing to the end, and pressing both together. Once deleted, you can insert it elsewhere with USE FRONT-INSERT (Control-A), and you can do so repeatedly to make multiple copies.
If you start the SwyftCard program but leave the disk drive empty when entering the editor, you get a blank workspace. Not only can you type text into it, but you can type expressions and have the editor evaluate it, even full Applesoft BASIC programs. For example, we asked it to PRINT 355/113 by highlighting it and pressing USE FRONT-CALC (Control-G; this doesn’t currently work in Mariani either). After that, we entered an Applesoft BASIC program, ending with RUN, so that it could be executed. If you highlight this block and press USE FRONT-CALC:
…you get this colorful display in the Apple low-resolution graphics mode. (Notice our lines could be in any order.) Our program waits for any key and then returns to the editor. While the original Swyft offered programming in Forth, the SwyftCard uses BASIC, which most Apple II owners would have already known well.
Finally, to save your work to disk, you can insert a blank disk and press USE FRONT-DISK (Control-L). The editor will save the workspace to the disk, marking it with a unique identifier, and it keeps track of the identifiers of what’s in memory and what’s on the disk to prevent you from inadvertently overwriting another previously saved workspace with this one. You can’t save a different workspace over a previously written disk without making an explicit CALL in Applesoft BASIC to the editor to erase it. Highlighted text, however, can be transferred between disks, allowing you to cut and paste between workspaces.
Although we can’t effectively demonstrate serial communications here, USE FRONT-SEND (Control-D) sends whatever is highlighted over the serial port, and any data received on the serial port is automatically incorporated into the workspace, both at 300 baud. Eric Rangell’s YouTube demonstration shows the process in action.
Human beings deserve a Humane Environment
In the prior article, we also discussed Raskin’s software projects, including the last one he worked on before his death in 2005.
In 2002, Raskin, along with his son Aza and the rest of the development team, built a software implementation of his interface ideas called The Humane Environment. As before, it was centered on a core single-workspace editor initially called the Humane Editor and, in its earliest incarnation, was developed for the classic Mac OS.
These early builds of the Humane Editor will run under Classic on any Mac OS X-capable Power Mac or natively in Mac OS 9 and include runnable binaries, the Python and C source code, and the CodeWarrior projects necessary to build them. (Later systems should be able to run them with SheepShaver or QEMU. I recommend installing at least Mac OS 9.0.4, and preferably Mac OS 9.2.2.) They are particularly advantageous in that they are fully self-contained and don’t need a separate standalone Python interpreter. Here, we’ll be using my trusty 1.33GHz iBook G4 in Mac OS X Tiger 10.4.11 with Mac OS 9.2.2 in Classic.
The build we’ll demonstrate is the last one available in the SourceForge CVS, modified on September 25, 2003. An earlier version is available as a StuffIt archive in the Files section, though not all of what we’ll show here may apply to it. If you attempt to download the tree with a regular CVS client, however, you’ll find that most of the files are BinHexed to preserve their resource forks; it’s a classic Mac application, after all. You can manually correct this, but an easier way is to use a native old-school MacCVS client, which will still work with SourceForge since the connection is unencrypted and automatically fixes the resources for you. For this, we’ll use MacCVS 3.2b8, which is Carbonized and runs natively in PowerPC OS X.
When starting MacCVS, it’s immaterial what you set the default preferences to because in the command sheet, we’ll enter a full command line: cvs -z3 -d:pserver:anonymous@a.cvs.sourceforge.net:/cvsroot/humane co -P HumaneEditorProject
The tree will then download (this may take a minute or two).
You should now have a new folder called HumaneEditorProject in the same folder as the CVS client. Go into that and find the folder named bin, which contains the main application HumaneEnvironment. Assuming you did the CVS step right, the application will have an icon of General Halftrack from the Beetle Bailey comic strip (which is to say, even a clod like General Halftrack can use this editor). Before starting it up, create a new folder called Saved States in the same folder with HumaneEnvironment, or you’ll get weird errors while using it.
Double-click HumaneEnvironment to start the application. Initially, a window will flash open and then close. If you’re running THE under Classic, as I am here (so that I can more easily take screengrabs), it may switch to another application, so switch back to it.
In HumaneEnvironment, press Command-N for a new document. Here, we’ll create an “untitled” file in the Documents folder. Notice that in this very early version, there were still “files,” and they were still accessed through the regular Macintosh Standard File package.
Here is the default document (I’ve zoomed the window to take up the whole screen). Backtick characters separate documents. Our familiar two-tone cursor we saw with the Cat and SwyftCard and discussed at length in the prior article is also maintained. However, although font sizes, boldface, italic, and underlining were supported, colors (and, additionally, font sizes) were still selected by traditional Mac pulldown menus in this version.
Leaping, here with a trademark, is again front and center in THE. However, instead of dedicated keys, leaping is subsumed into THE’s internal command line termed the Humane Quasimode. The Quasimode is activated by pressing SHIFT-SPACE, keeping SHIFT down, and then pressing < or > to leap back or forward, followed by the text (case insensitive) or characters. Backticks, spaces, and line terminators (RETURN) can all be leapt to. Notice that the prompt is displayed as translucent text over the work area;
no ineffective single-option modal dialogue boxes died to bring you these Death Star plans.
Similarly, tasks such as selection (the S command) are done in the Quasimode instead of pressing both leap keys together.
When text is deleted, either by backspacing over it or pressing DELETE with a selected region, it goes to an automatically created and maintained “DELETION DOCUMENT” from which it can be rescued. (Deleting from the deletion document just deletes.) The Undo operation does not function properly in this early build, so the easiest way to rescue accidentally deleted text is from the deletion document. It is saved with the file just like any other document in the workspace, and several of the documentation files, obviously created with THE, have deletion documents at the end.
A full list of commands accepted by the Quasimode are available by typing COMMANDS, which in turn emits them to the document. These are based on Python files, which are precompiled from .hpy sources (“Humane Python”), which you can modify and recompile (using COMPILE) on the fly. There is also a startup.py that you can alter to immediately set up your environment the way you want on launch. Like COMPILE, several commands are explicitly marked as for developers only or not working yet.
Interestingly, typical key combinations like Command-C and Command-V for copy and paste are handled here as commands.
The CALC command can turn a Python-compatible expression into text containing the result, though it is not editable again to change the underlying expression like the Cat. However, the original text of the expression goes to the deletion document so it can be recovered and edited if necessary. A possible bug in this release is that the CALC command fails to compute anything if the end-of-line;
part of the selected text.
Similarly, the RUN command will take the output of a block of Python code and put it into your document in the same way. Notice the code is not removed like with the CALC command, facilitating repeated execution, and embedded Python code;
expected to be indented by two fixed leading spaces so that it would stand out as executable text—passing Python code that is not indented won’t execute, and the RUN command won’t raise an error, either. Special INDENT and UNINDENT commands make the indenting process less tedious.
Subsequent builds migrated to Windows, renamed “Archy” not only after Don Marquis’ literary insect but also the Raskin Center for Humane Interfaces, which, of course, is abbreviated RCHI. To date, Archy remains unfinished, and the easiest example to run is the final build 124 dated December 15, 2005, available for Windows 98 and up. The build includes its own embedded Python interpreter, libraries, and support files, and as a well-behaved 32-bit application, will run on pretty much any modern Windows PC. Here, I’m running it on Windows 11 22H2.
The program comes as a formal installer and needs no special privileges. An uninstaller is also provided. Although it’s possible to get Python sources from the same page for other systems, the last available source tarball is build 115, which may lack every Windows-specific change to various components needed later. If you want to try running the Python code on Mac or Linux, you will need at least Python 2.3 but not Python 3.x, a compatible version of Pygame 1.6 or better, and their prerequisites.
To start it up, double-click the Archy executable in the installed folder, and the default document will appear. Annoyingly, Archy’s window cannot be resized or maximized, at least not on my system, so the window here is as big as you get. Archy’s default font is no longer monospace, and size and colour are fully controllable from within the editor. There are also special control characters used to display the key icons. The document separator is still entered with the backtick but is translated into its own control character.
The default document had substantially grown since the THE era and now includes multiple example tutorials. These are accessed through Archy’s own command mode, which is entered by holding down CAPS LOCK and typing the command. Here, for the first example, we start typing EX1 and notice that there is now visual command completion available. Release CAPS LOCK, and the suggested command is used.
Archy tutorials are actually narrated with voiceovers, plus on-screen animated typing and keyboard. There are six of them in all. They are not part of your regular document, and your workspace returns when you press a key.
The awkward multi-step leap command of THE has been replaced once again with dedicated leap keys, in this case Left and Right Alt, going back to the SwyftCard and Cat. Selection is likewise done by pressing both leap keys. A key advancement here is that any text that will be selected, if you choose to select it, is highlighted beforehand in a light shade of yellow, so you no longer have to remember where your ranges were.
The COMMANDS verb gives you a list of commands (notice that Archy has acquired a concept of locked text, normally on a black background, and my attempt to type there brought me automatically to somewhere I actually could type). While THE’s available command suite was almost entirely specific to an editor application, Archy’s aspirations as a more complete all-purpose environment are evident. In particular, in addition to many of the same commands we saw on the Mac, there are now special Internet-oriented commands like EMAIL and GOOGLE.
Unlike THE, where you had to edit them separately, commands in Archy are actually small documents containing Python snippets embedded in the same workspace, and Archy’s API is much more complete. Here is the GOOGLE command, which takes whatever text you have selected and turns it into a Google search in your default browser. In the other commands displayed here, you can also see how the API allows you to get and delete selected text, then insert or modify it.
Here, we’ll take the LEAP command itself (which you can change, too!), select and copy it, and then use it as a template for a new one called TEST. This one will display a message to the user and insert a fixed string into the buffer. The command is ready right away; there is no need to restart the editor. We can immediately call it—its name is already part of command completion—and run it.
There are many such subsections and subdocuments. Besides the deletion document (now just called “DELETIONS”), your email is a document, your email server settings are a document, there is a document for formal Python modules which other commands can import, and there are several help documents. Each time you exit Archy, the entire workspace with all your commands, context, and settings is saved as a text file in the Archy folder with a new version number so you can go back to an old copy if you really screw up.
Every cul-de-sac ends
Although these are functional examples and some of their ideas were used (however briefly) in later products, we’ve yet to see them make a major return to modern platforms—but you can read all about that in the main article. Meanwhile, these emulations and re-creations give you a taste of what might have been, and what it could take to make today’s increasingly locked-down computer hardware devices more humane in the process.
Sadly, I think a lot of us would argue that they’re going the wrong way.