Copyright PetaPixel
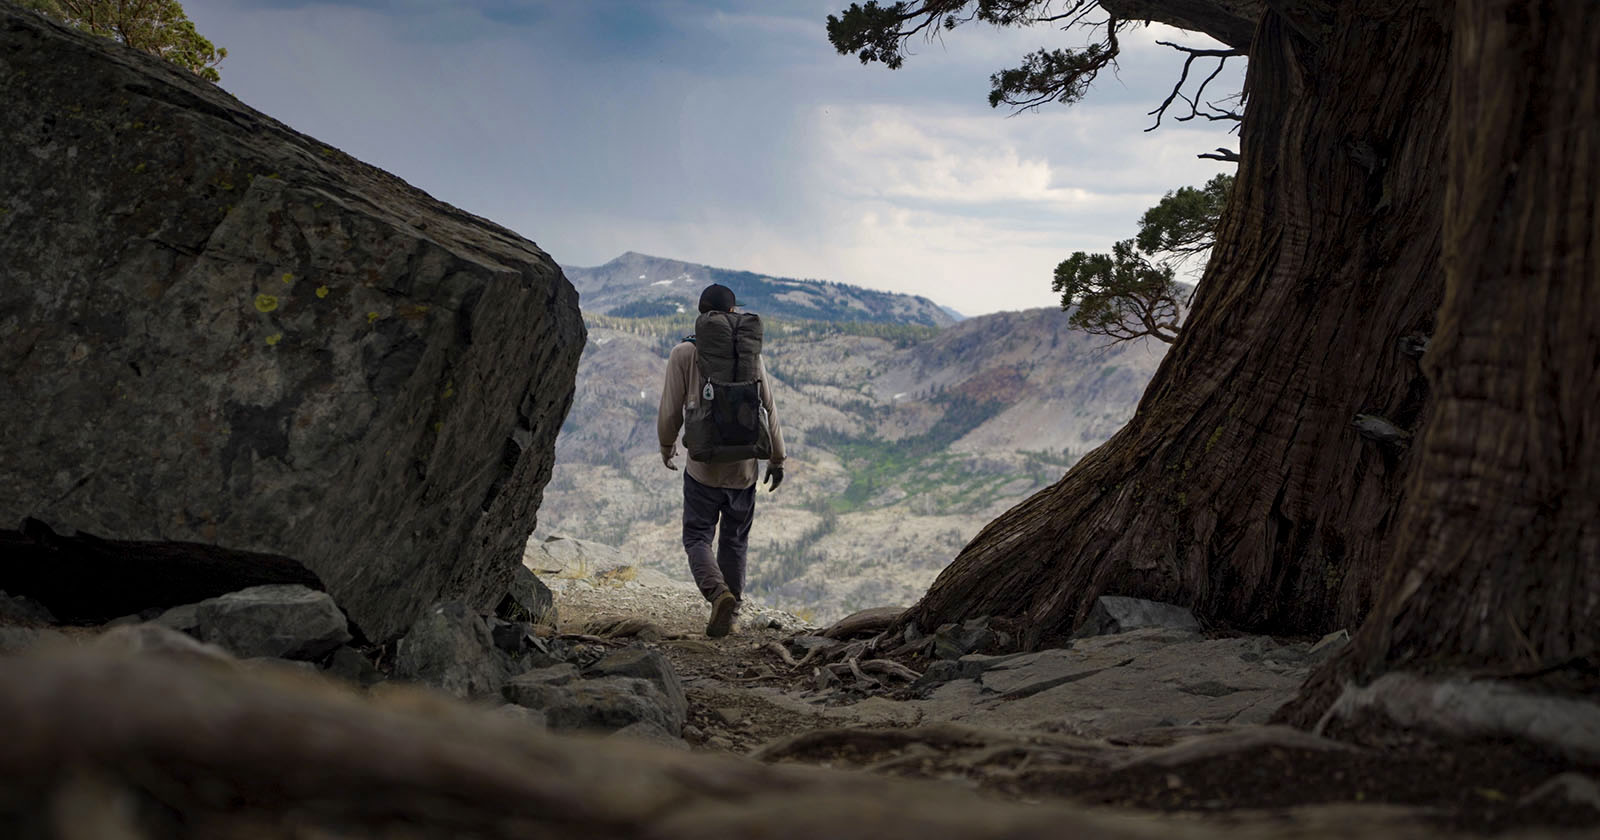
It was sunset on top of the tallest mountain in the continental United States, and I had two immediate priorities. One was dinner. As a long-distance backpacker on the Pacific Crest Trail, I was burning between 4,000 and 6,000 calories a day, and losing too much weight was a constant concern for myself and my friends. The other priority was 32.4 ounces of metal and glass clipped to the shoulder strap of my backpack: my camera. And as the sun sank towards the horizon, I kept neglecting my dinner in favor of keeping up with the ever-changing lighting. In addition to taking over 400 pictures on top of that mountain, I had another goal with my camera. Switching over to video mode whenever possible to record the feeling of being up there in a way that pictures struggle to capture. Even though I started off as a landscape photographer on my backpacking adventures, I eventually fell down the rabbit hole of making videos as my adventures expanded in scope. In a previous article, I talked about choosing a photography camera for long distance backpacking, a demanding environment that makes recommending a camera trickier than for regular life. In this article, I’ll cover the demands of shooting video on trail, an even more demanding task than photography. Section 1: The Unique Demands of Backpacking Walking 25-plus miles a day for thousands of miles through the wilderness makes two camera specs matter a bit more than they do in regular life: weight and durability. Weight is critical; it’s not uncommon for backpackers to cut the handles off their toothbrushes in an effort to shed unnecessary grams. The lighter your pack, the more likely you are to avoid injury and complete the trail. Unfortunately, cameras are heavy, and good cameras are usually heavier. Durability is also important since hikers are spending the majority of the time outside, often on dusty or rainy trails with little shelter from the elements. For this article, I’ll be focusing on the lightest and most capable video cameras available that are also weather sealed. While it is possible to backpack with a non-sealed camera successfully (I did for years), it’s not something I could recommend to anyone without some caveats I’ll outline below. But if you’re looking to get a camera for making videos of your backpacking adventures, the first step has nothing to do with gear. Section 2: Understanding Your Finished Video Goals The fastest way to end up with a disappointing video and a frustrating experience is to go into the project with no vision about what you want to accomplish. Are you casually vlogging? Are you making a video essay about the dichotomy of seeking both connection and solitude in the wilderness? The needs of a casual “for the memories” video are very different from those of a nature documentary, both in shot type and equipment, so before you buy a camera or go out into nature, the best thing you can do is figure out what you’re going to make. For the purposes of this article, I’ll try to focus on as versatile a kit as I can for casual vlogging up to amateur documentary, and explain where each camera has their strengths. Success comes from knowing what your vision is and applying thoughtful gear choices that will make that a reality. Section 3: Categories of Video Cameras In general, there are four categories of video equipment that are reasonable to use on a long-distance hike: Smartphones Action Cameras Mirrorless Cameras Compact Cameras Smartphones have come a long way in video quality and are viable options for dedicated videographers who are committed to saving weight. With newer iPhones able to shoot Apple Log / ProRes RAW, and Android devices being able to shoot RAW and various Log formats (including Apple Log, funny enough) using MotionCam Pro, the technical limitations of phones are growing increasingly slim. However, there are still some drawbacks. The smaller sensor sizes mean low-light capabilities are limited, and while portrait mode video is impressive, it’s not comparable to true shallow depth of field. Additionally, the loss of micro SD cards in phones (RIP) means the large file sizes of high bitrate video will probably require an external storage device at some point or a pricey storage upgrade for your phone. However, it can’t be denied that smartphones can offer serious video capabilities if used properly. Action cameras are an incredible tool for some unique perspectives. Their ultrawide field of view, excellent stabilization, and rugged designs make them well-suited for the outdoors. Additionally, they’re dead simple and can offer push-button video that looks decent without much work. But while they might be the first camera people think of when “backpacking” is mentioned, they don’t make good primary cameras. No shallow depth of field ability, poor low light capabilities, and a field of view that is striking but limited. This leaves mirrorless cameras as the highest quality tools for capturing good video while backpacking. With tons of options at various price points and capabilities, their only downside is that they’re all relatively heavy and bulky compared to phones or action cameras. Whether the improved image quality and flexibility is worth it on a hike is a personal question depending on the end video goal, but for anyone serious about making videos, this is the weapon of choice. Section 4: What about compact cameras? There is another category that I need to talk about, and that is the compact camera. In my previous article, I didn’t give them much mention because nearly all lack any meaningful weather sealing. Upon reflection, I think that’s a bit of a miss because people clearly use them a lot, so I want to address it here. Compact cameras such as the DJI Pocket 3 and the Sony ZV-1 II dominate the casual creator market. They’re small and light enough to carry easily, their video quality is only a step below mirrorless cameras, and they’re downright easy to use. Canon announced a Powershot V1 in February of 2025, but Nikon and other manufacturers haven’t released competitors into this space in a while. I’ll be including the Pocket 3, ZV-1 II, and Powershot V1 into the comparison because of their popularity. Their lack of weather sealing can be slightly mitigated because they’re small enough to quickly slip into a more protected pocket in a way that mirrorless cameras can’t easily do with the classic shoulder-mounted system. The extending zoom of the Sony and Canon and the gimbal of the Pocket 3 are easy places of mechanical failure, and when you’re on a dusty trail for months, both could cause an expensive gear failure, but that’s a risk calculation I leave up to you. Section 5: Stabilization I have a bit of a confession: I’m a stabilization nerd. From making my own wood and aluminum camera stabilizers 15 years ago, to running separate gyro logging apps to try and stabilize cameras without good EIS, I love it all. And one of my highest priorities is buttery smooth footage whenever possible. This is where we run into one of the biggest hurdles of long-distance backpacking videography: gimbals aren’t exactly lightweight, which means leaning on alternate forms of stabilization such as IBIS and OIS, but my favorite form by far is gyro EIS. Gyro EIS uses the gyro information from a dedicated sensor chip in a camera to make intelligent distortions to the video frame by frame that results in as perfect EIS as possible. This is the tech behind recent GoPro stabilization, the iPhone’s action mode, and Sony’s Dynamic Active Steadyshot. When it works well, it’s magical. And unlike IBIS or OIS, it has a much greater range of movement that can be accounted for, but this also reveals a big weakness. Because it’s still EIS, it crops into the frame. The level of cropping can adjust dynamically depending on the implementation, so non-walking shots might only incur a 5% crop, while heavy movement might need 20%. Many cameras offer built-in GyroEIS, but unless you’re set on delivering straight out of camera, I recommend disabling this and stabilizing in post. Most in-camera systems have a set crop, but stabilizing in post allows you to dynamically adjust the crop amount to preserve as much FOV as possible. The key to all of this is a piece of software called Gyroflow, which was built out of the FPV drone community, but now supports many cameras. Of the mirrorless camera manufacturers, only Sony has opened up their gyro data to 3rd party software like Gyroflow. This gives them a huge advantage in my opinion, since you can lean on much more powerful software than the one built into the camera to get nearly perfect stabilization. It also corrects for rolling shutter artifacts of the whole frame and applies stabilization in post so it’s not baked into your videos, allowing for maximum flexibility. It’s also worth noting that MotionCam Pro is compatible with Gyroflow, meaning that people dedicated to smartphone videography can also get beautiful stabilization, but more on that later. A big downside to GyroEIS and any EIS is the necessity of fast shutter speeds to minimize motion blur in the scene. If this is a stylistic sacrifice you’re willing to make, then welcome to the most adaptable and smoothest stabilization around. However, if you’re a strict adherent to the 180-degree shutter rule, then OIS and IBIS units will need to do the heavy lifting, and in my experience, they’re not up to the task of stabilizing walking video sufficiently. Even champions of the technology, like OM System, will still have bumps and jitters. However, much like sacrificing a 180-degree shutter, deciding how smooth of stabilization is needed to realize your video dreams is a personal choice. Section 6: Shallow Depth of Field There’s an argument to be made that achieving shallow depth of field in videography — especially vlogging — is one of the key “look” distinctions that separates dedicated cameras from smartphones. As mentioned above, apps like MotionCam that bypass the sharpening and noise reduction baked into the stock camera app can do a lot to reduce the “smartphone look,” but they can’t beat physics. A large sensor and large aperture are required for true shallow depth of field. Portrait mode video is a fun tool, but there’s a reason it’s plateaued in results in recent years; it’s not a true replacement. Therefore, if this is a look you’re after, going up to a larger sensor or faster lens could be worth it, and might be the difference between choosing a fast prime or a slow zoom. I’ll be including a graph with equivalent apertures below the comparison table for this purpose. Section 7: Spec Chasing What video specs matter to you is a personal choice. Whether you need 10-bit video, or you need 4k60p, or even GyroEIS which I’m such a big fan of, depends on what type of content you’re planning on making. And if you don’t have your video fundamentals — storytelling, composition, lighting, pacing — figured out, no amount of extra color depth, dynamic range, or stabilization is going to fix your project. It’s the reason why competent videographers can make beautiful things with just their phone, and beginners often struggle even if they have a Sony FX3 or Canon C70. Section 8: Comparison Table and Selection Criteria Below is a section of cameras and lens combinations from a variety of manufacturers. I focused on finding weather-sealed bodies that were small and light with fully articulating screens, 4k video, and decent stabilization. For prime lenses, I focused on finding a 20mm equivalent, erring on the side of wider when I couldn’t. For zoom lenses, I tried to find a lightweight ultrawide zoom that started around that same 20mm mark. Price was also a major factor. Any money saved on a camera could be put towards a lighter tent or other hiking gear. To save cost, an older used camera body can offer excellent value. First up, we’ll start with the options that don’t offer interchangeable lenses: To avoid listing every smartphone, I’m using general specs here based on a Samsung S25. For those in pursuit of the lightest and cheapest setup possible, it’s hard to beat something you probably already own that you’re going to carry anyway. Add onto that recent developments from camera apps such as MotionCam Pro that allow for RAW recording at 4k with GyroEIS stabilization, and you’ve got a powerful setup. On the iPhone side, Apple Log / ProResRAW provide similar benefits. The downside is any meaningful shallow depth of field, possible external storage, and an extra battery bank to account for higher use. The GoPro Hero 11 Black is an older model, but it represents a good value if all you’re after is good image quality from an action camera. It was the first model to offer the new 8:7 sensor, and although the improvements to newer GoPros are nice to have, they’re not essential. Other action cameras from DJI and Insta360 will also perform well, but the differences between models in the past few years have been limited, which indicates a maturing product category with solid fundamentals. As mentioned above, I think action cameras are best used as secondary cameras for more rugged shots, or for ultrawide perspectives, which is why I’m only highlighting one model here. The DJI Pocket 3 is a hugely successful camera; I saw a few of them on the PCT myself, and it’s easy to see why. It’s the closest thing to “easy mode” you’ll find on this list. Beautiful video, great stabilization, all in a compact option. Although it’s not weather sealed, it’s small enough to tuck into a protected pocket whenever not in use, so for those that understand the limitations, it’s a great option. The Sony ZV line has seen immense success in the creator market, and the ZV-1 II is the smallest and lightest option. It will work well in auto mode, but I think that the Pocket 3 works better for people who just want something easy to vlog with. Instead, I think the ZV1mkII works better as a lightweight intermediate camera due to that versatile zoom and the inclusion of Gyro EIS. Instead of using the built-in stabilization, the ZV1mkII will give much smoother results when processed with an app like Gyroflow, and with the lack of OIS or IBIS, that will be a necessity. The Canon Powershot V1 is the newest addition to this table, and does a lot of things right for a compact camera. It’s got excellent 10bit 4k video, the option to crop for 60p, and a nice wide zoom lens. However, it’s nearly as heavy as the Micro Four Thirds option, and while the stabilization is decent for what it does, it’s no match for GyroEIS or a gimbal. Overall, my recommendation for this group of cameras is to see if your phone can work for you. The ability to record in Apple Log on iPhone or RAW/Log with MotionCam on Android removes most of the “smartphone look,” even if it’s replaced by “small sensor look.” In this class of cameras, the image quality difference is very close, and the ability to get three lenses in such a small package offers amazing versatility. However, if, for whatever reason, you’re not a smartphone person, or want some shallow depth of field, then vloggers would be best served by the DJI Pocket 3. And if your video ambitions include not just vlogging Moving up to interchangeable lens mirrorless cameras, this is where things get serious. The older Olympus E-M5 III (now known as the OM System OM-5 line) has perhaps the best standalone IBIS on this list, and when paired with either of the two lenses listed, should produce pleasing video. The downside is that it only shoots in a “Flat” profile for limited grading potential, but Olympus cameras have always had nice colors straight out of camera, so for someone who doesn’t want to fuss with grading a lot, this could be a good option. Unfortunately, although the two Panasonic lens options are excellent, weather-sealed lenses on Micro Four Thirds come at a size and weight premium, which negates the weight advantage slightly. Jumping to APS-C, the Canon R7 is a bit of an overkill beast of a camera, but it’s Canon’s least expensive weather-sealed model. You’re getting a lot of camera here, with full-width 4k60p (albeit line-skipped), 10-bit CLog3, but that comes wrapped in the heaviest body on this list, and one of the most expensive too. However, it has good IBIS for video stabilization, with the biggest artifact being wobbly corners, and a decent boosted EIS mode as well. For primes, the RF mount is saved with the recent Sigma 12mm f1.4 being one of the few good options. And for a zoom option, Sigma is back with the 10-18mm f/2.8. Sony follows behind Canon by gatekeeping weather sealing to only their most expensive APS-C camera, the incredible a6700. Out of any APS-C camera on this list, this offers the most raw performance, with up to 4k120p with crop and full-width 4k60p, 10-bit SLog3, and GyroEIS for buttery smooth stabilization. It does cost a lot, but since this is on E-mount, there are a few excellent options depending on price. I’ve selected the Yongnuo 11mm f1.8 because it’s half the price of the otherwise excellent Sigma 12mm f1.4, but the Samyang 12mm f2 is another good lightweight option. For zooms, the Sigma 10-18mm f/2.8 comes back again, providing a small and sharp ultrawide option. Fujifilm follows the Sony and Canon trend of not offering weather sealing below their more expensive options, so the XT-4 is the second and largest body here, behind the R7. And while it’s more of a photography-focused option, it has surprisingly capable video specs, including 4k30p, 10-bit, in FLog. The IBIS system is fair, but not as capable as the other IBIS systems and far behind Gyro EIS. Yet again, Sigma saves the day with a great zoom and prime option with their 10-18mm f/2.8 and 12mm f/1.4. Nikon finally shows a truly video-focused body with the Z30, and not only that, it’s much cheaper than other options. For that lower cost, there are some tradeoffs, namely 8-bit video with no log options, and only light weather sealing. Stabilization isn’t a strong suit here, as the EIS is middling compared to the competition. But thankfull,y there’s an excellent zoom in the Nikon 12-28mm f2.3-5.6, providing a great lightweight 18-42mm equivalent. Nikon loses out on access to the excellent Sigma 12mm f/1.4 and instead is stuck with the bulky and expensive Sigma 16mm f/1.4 as the best prime option. Finally, we get to full frame with the Sony A7C. While there’s no doubt that the Mark II version of this camera is better in nearly every way, I’ll argue that the improvements aren’t necessary for most backpackers, and the extra money would be better put towards upgrading other gear. What you do get is the best low-light performance, and the shallowest depth of field potential, along with GyroEIS for great stabilization. The 4k video is only 8-bit, but is oversampled for a ton of detail. The most surprising thing is that the price and weight aren’t that far off from the competition. Whether your style of video benefits from low-light and shallow depth of field is up to you, but it’s great that there’s at least an option. E mount is also full of excellent options, but Tamron steals the show with their 20mm f2.8 prime and their unique 20-40mm f/2.8 zoom. An additional trick is that the A7C can crop to an APS-C region to boost to 60mm of reach on the 20-40mm. The other full-frame option is the flagship of the Sony ZV line, the ZV-E1. With the same sensor as the A7S III and FX3, the ZV-E1 tops the list for capabilities, offering 4k60p uncropped and a 10% crop for blistering 4k120p. Add on 10-bit SLog3 and GyroEIS, and there are a few projects that will challenge this camera, but it comes at a price. Even with the affordable E-mount lens options, it comes out a few hundred dollars ahead of other options. The other big weakness here is overheating since long-distance trails are frequently hiked in summertime, and through the desert in some areas. However, if your style of shooting doesn’t favor long takes, this might not matter a lot. The Tamron 20-40mm stays as the zoom choice over the Sony 16-25mm, as I argue that 20mm is wide enough for vlogging, and the 40mm allows for more creative shooting perspectives than the 25mm. But if the ZV-E1 is a cost-is-no-object selection, then the incredible Sony 16mm f/1.8 has to be the prime pick. For people chasing shallow depth of field, below is a graph that shows the equivalent apertures of all the options listed here, both zooms and primes. The Y-axis is truncated for clarity, so the GoPro and ultra-wide lens of the phone are cut off. Note that true aperture changes are not linear along a zoom range; this is only an illustration. Also, a low f-number doesn’t mean shallower depth of field at all times. You have to consider the distance to the subject as well, but that calculation is a bit outside the scope of this article. I recommend comparing lenses on dofsimulator.net to see what the background blur is for each lens combination at a portrait distance. What’s notable here is the power of lens design, the Sigma 12mm f/1.4 makes the three APS-C systems shine, albeit at a higher cost (the a6700 can use the Sigma 12mm, but I selected the Yongnuo 11mm f/1.8 as a cost-saving alternative). Of course, for ultimate background blur, the full-frame ZV-E1 with a 16mm f/1.8 can’t be beat, albeit it comes at a higher cost and weight. Section 9: Notable Alternatives There are two cameras that didn’t make the comparison table for a few reasons: the Sigma fp and the Canon R8. The Sigma fp is a powerful and tiny camera boasting amazing RAW video capabilities, but it’s held back by some severe limitations. No articulating screen, terrible EIS, inconsistent autofocus, short battery life, and confusingly poor non-RAW video. If you’re someone who is mostly shooting locked-off landscape shots and wants a RAW workflow in the smallest possible body, this will be great, but it’s hardly something I’m recommending to everyone. The Canon R8 is another awkward camera for this category, not because of the body limitations, but rather because Canon’s full-frame lenses don’t offer a reasonable option here. There aren’t any affordable, weather-sealed, wide-angle zooms or primes anywhere in the full-frame RF lineup. Yes, the 14-35mm f/4 is a good option, but at about the same cost as the R8 body, it would also make it the heaviest and most expensive combination. Although the R7 is larger and heavier than the R8, it makes up for it with smaller and cheaper APS-C lenses. Until Canon decides to stop limiting their full-frame lens options or open up the mount, Canon’s full-frame just doesn’t make sense for long-distance backpacking when there are better, cheaper, and lighter options available at the moment. Section 10: Recommendations Overall, serious videographers would be hard-pressed to push the Sony ZV-E1 past its limits, and when combined with the Tamron 20-40mm f/2.8, it’s the best video camera to take long-distance backpacking. With the most capabilities out of any camera on this list, it’s a clear top pick. But it also comes at a steep cost, and most videographers should ask themselves if they really need all that power when the Nikon Z30 offers good specs for less than half the cost. That’s a lot of money that can go towards lightening your backpack and increasing your chances of finishing the trail. If you don’t need great stabilization, it’s my top budget pick. And even compared to mirrorless cameras, there’s still an argument to be made for an even more budget-friendly option with the aforementioned ZV-1 II. On the wide end, it actually offers a larger equivalent aperture than the Nikon Z30 (with an 18mm f/4.9 vs an 18mm f/5.3) so getting a touch of shallow depth of field is better on the ZV-1 II, while coming in much cheaper, and crucially gains GyroEIS for a huge advantage in stabilization. But I didn’t end up carrying either of those cameras. While my recommendations are for a general user, it’s important to understand who you are and what your video needs require, and mine strayed a bit outside of general. Section 11: Back on the Mountain Up on top of Mount Whitney, the sun had finally slipped below the horizon, and a gradient of orange to inky black stretched across the entire atmosphere above me. I had finally taken my dinner break, along with the seven other members of my trail family, to enjoy a hot meal of rice, tomatoes, and tuna, and set my camera aside for a while to just enjoy the time with friends on the rooftop of the lower 48. When we hiked back down from the peak and stars glimmered high above, I grinned as I thought about all the astrophotography I wanted to try up in these peaks, and the low-light video I hoped to capture. While I know I would have been content with a camera like the ZV-1 II, or even just my phone running MotionCam, I knew my passions for low light were pointing me towards a clear winner for what videos I wanted to make. I ended up carrying the Sony A7C and Tamron 20-40mm f/2.8 for the entire trail, and my passion for video and photos earned me the trail name “Portrait” around mile 520 in the southern California desert. I chose the A7C and 20-40mm because of the unique combination it offered for my style of shooting. I was looking for: incredible stabilization, a zoom lens that was wide enough for vlogging and landscapes but could zoom to a normal field of view, excellent low light capabilities for both video and astrophotography, all in a small, lightweight package. Additionally, I carried a GoPro for rugged and ultrawide needs, and used my phone for times when either wasn’t an option. All the images in this article are still frames from the 4k video out of the A7C. The Pacific Crest Trail ended up being the most challenging and exciting shooting environment of my life. Waking up every day at 5 AM, I caught so many sunrises, saw storms sweep through mountains, found massive snowfields high in the Sierra, not to mention wildfires, smoke, and huge river crossings. But for what it was like to actually walk the trail and document it while balancing the effort of actually walking across the country, that will have to wait for Part 3. Highs, lows, what cameras I saw others carrying, the true social media influencers I met plus managing storage, backups, and the accessories I carried that made this all once-in-a-lifetime filming opportunity possible. Disclaimer: The options listed above were only a subset of the vast array of cameras that would thrive while backpacking. The decision to limit discussion to weather-sealed options for the mirrorless category is sure to be divisive. I personally shot a non-sealed camera outdoors for years without issue, so I have a lot of opinions as well, but they’re all out of the scope of this article. Additionally, while I like to think I keep the entire B&H catalog in my head, I’m sure to have missed an option, so leave your recommendations and reasons in the comments below. Especially if you’re a backpacker yourself, share your story of what gear works for your style.