Copyright XDA Developers
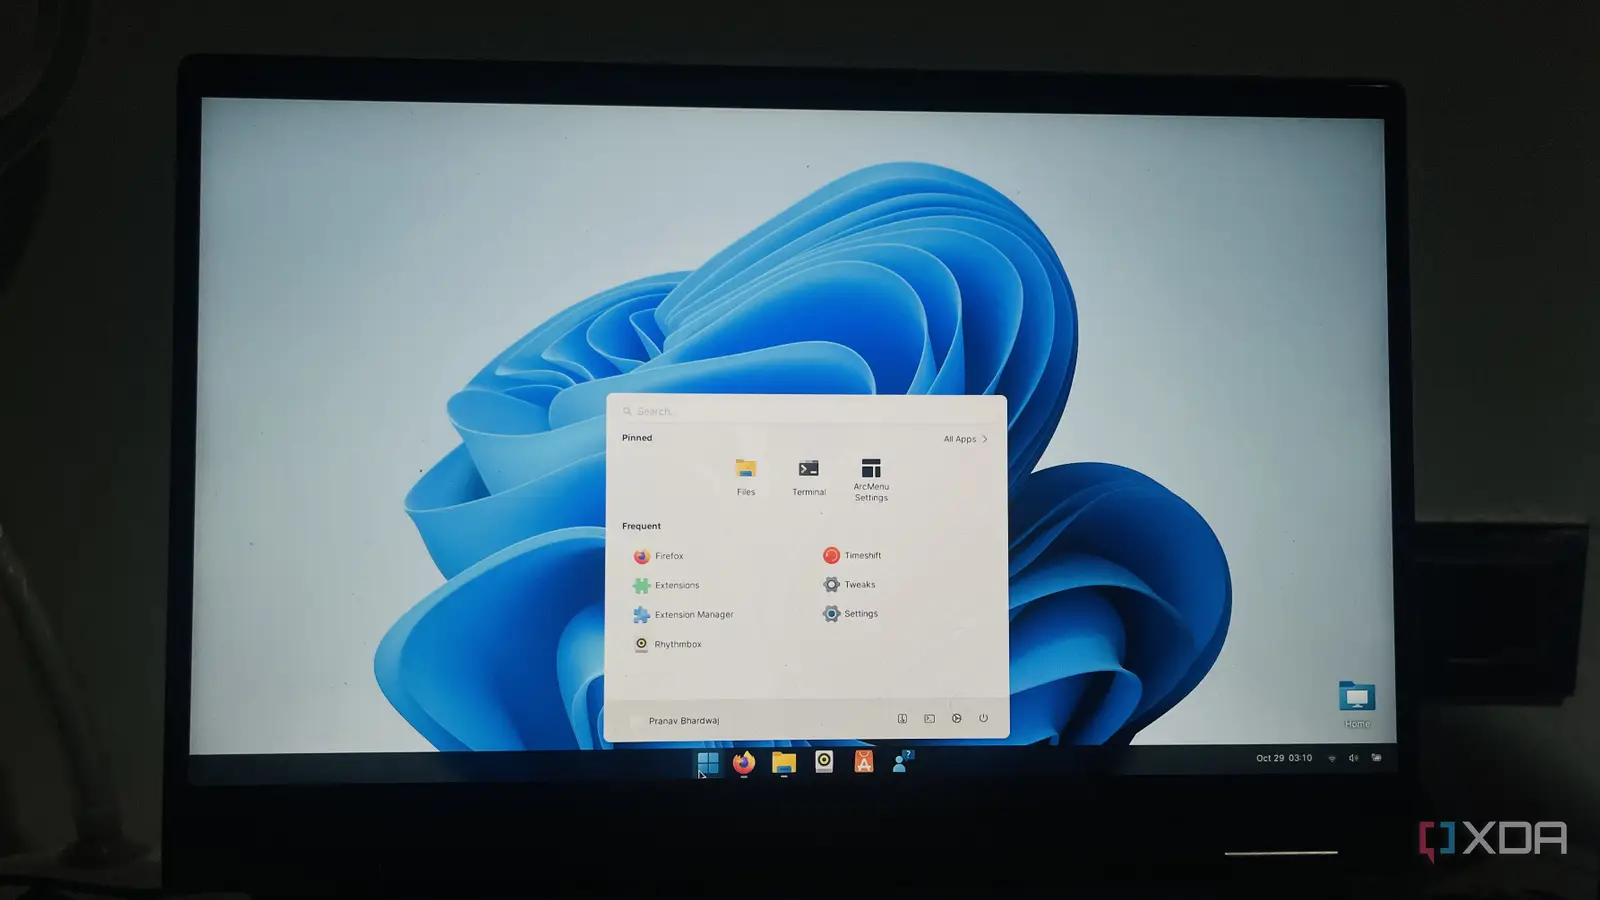
I've been using Ubuntu for a long time, from when I installed it for the first time in my college days to learn programming. It gives me the stability and open-source freedom that's not possible on Windows or macOS. Also, it's one of the distros that runs well on my older laptop, gives me total control over what gets installed, and doesn't force me with unnecessary prompts (also, it's free). However, I am an avid Windows user and, in addition to Ubuntu, also spend a considerable amount of time on Windows 11 for my work. To be honest, I prefer Windows 11's interface to Ubuntu's because of my long-time familiarity with the OS. Considering that, I decided to give my Ubuntu 24 a makeover and see how close I could get it to look like Windows 11. Of course, I wasn't expecting a perfect replica, but the end results turned out better than I expected. What I used to get the Windows 11 look on Ubuntu Themes, menu, icons, and little tweaks, all free and open-source There are tons of different methods to transform Ubuntu into Windows, but I decided to play it safe. Everything I used was from trusted Linux and GNOME sources. Here are the major components that helped me transform my system: Win11-gtk-theme-main and Fluent-gtk-theme (I tested both, but finally stuck with Win11) Windows 11 icon pack Dash to Panel and AppIndicator extensions (to recreate the taskbar and system tray) Arc Menu extension (to get a Start Menu-type menu) Official Windows 11 wallpapers Step 1: Preparing the system Installing the essential prerequisites Before going for the appearance tweaks, I ensured that my system was fully prepared for it so that the process would go flawlessly. At first, I made sure Ubuntu was up to date by running these commands: sudo apt update && sudo apt upgrade -y Then I use this command to install core tools and utilities like GNOME Tweaks and Extension Manager, essential for customizing the GNOME environment: sudo apt update sudo apt install -y gnome-tweaks gnome-shell-extensions gnome-shell-extension-prefs \ gnome-software-plugin-flatpak unzip git wget Next, I created all the required folders for storing themes and icons with this command: mkdir -p ~/.themes ~/.icons ~/.local/share/fonts ~/W11-assets For the worst-case scenario, I created a Timeshift snapshot and recommend the same to you before making any changes to the system. It takes less than a minute if you do it regularly, and lets you restore your Ubuntu system if anything goes wrong during the process. Step 2: Recreating the Windows 11 taskbar Dash to Panel turns the default dock into something familiar The default Ubuntu dock is on the left of the screen, which is a pleasant surprise at first and also pretty functional, but over time, I started missing the Windows 11 taskbar. Using Extensions Manager, I installed the Dash to Panel extension, which merges the top bar and dock into a unified taskbar. This disabled the left side dock, and I got something familiar. To make it Windows 11-ish, I configure it in the following way: Centered the app icons Placed the clock and system tray to the extreme right For a more Windows 11-like compact look, I reduced the icon padding and spacing I also disabled the GNOME overview on startup All these settings gave me a taskbar that almost felt like Windows 11's. Step 3: Adding a Windows-style Start Menu Using the Arc Menu for a near-identical launcher To complement the recently created taskbar, my next step was to replicate the Windows 11 Start Menu in my Ubuntu system. For that, I installed the Arc Menu extension (from Andrew Z) using Extensions Manager. Further to ensure it works smoothly, I installed a necessary dependency using this command: sudo apt install gnome-menus -y To make it relatable, I applied a few configurations. In the Arc Menu settings, I switched to the "Modern" layout and selected the Windows 11 style menu. I then repositioned the menu icon to the bottom center through Dash to Panel settings. The result was a Start Menu that showed pinned apps, recent files, and a search bar – similar to the Windows Start Menu. I further changed its icon to the Windows 11 start menu icon for familiarity. Step 4: Applying the Windows 11 theme Fluent vs Win11 GTK, picking the better-suited one Next, I installed custom themes to make Ubuntu look like Windows 11. I downloaded and installed two popular ones, Fluent-gt-theme and Win11-gtk-theme-main. I got both these from a popular and safe website: gnome-look.org. However, I settled on Win11 because it is well-suited to my Windows 11 experience. The setup was easy. After downloading, I copied both themes to the ~/.themes folder I created before. And used the ./install.sh command to install them. Then, to apply the themes, I launched GNOME Tweaks and selected the theme of my choice from Appearance -> Themes. Step 5: Installing Windows 11 icons, cursors, and fonts Small changes, big visual payoff Next, from the same website, I also downloaded the icon and cursor packs. I chose the Windows 11 Blue Icon Pack as they are similar to the original Windows 11 icons. I placed them in the ~/.icons folder I created earlier. After that, I applied the icons via GNOME Tweaks under the Appearance settings. Next, I downloaded the Segoe UI font, which is the official Windows 11 font across its interface. Again, I applied the downloaded font via GNOME Tweaks settings. All these changes appear small, but together they make your Ubuntu more like Windows 11. Finally, I used the Blur my Shell extension to apply blur effects like those in Windows 11. Step 6: Wallpaper and final touches The finishing layer To wrap it up, I downloaded the official Windows 11 Bloom wallpaper and set it as the desktop background. I didn't make any changes to the lock screen. With this change, the desktop looked remarkably close to Windows 11. I also checked the font and icon sizes and went back to Dash to Panel to make some final adjustments. And that was it. How does it perform after all the changes Looks like Windows, performance like Ubuntu Even after making these visual overhauls, my Ubuntu system remained fast and responsive. There was no change in the boot time, and apps also launched smoothly. I actually made sure, from the start, to choose extensions and themes that don't negatively impact my system performance. It's like getting the familiar interface of Windows with the freedom and performance of Linux. The drawbacks A few trade-offs you should know Of course, like any experiment, this setup wasn't without a few downsides. First, almost everything is manual and may take time, especially if you prefer to fine-tune every detail. The themes and extensions might occasionally break after the major GNOME or Ubuntu updates. Therefore, you should be prepared for that. Also, I noticed inconsistencies in some older apps in adapting the themes I applied, probably because they don't fully follow the GTK theming system. And, of course, changing themes, icons, and wallpapers doesn't mean you can run native Windows apps on Ubuntu. You still require Wine or a VM. Also, I didn't aim for the exact visual makeover. Obviously, it's impossible to replicate Windows 11 exactly on Ubuntu, since the two are entirely different operating systems. It's not like giving Windows 11 a Windows 10 makeover, where you can tweak more deeply because of the same environment. So, if you are like me, who likes the aesthetics of Windows 11 but prefers the flexibility and stability of Linux, this experiment will offer you the best of both worlds.