DietPi is my easy pick whenever I need an operating system for my Raspberry Pi. It’s full of features that other SBC operating systems lack, and doesn’t require too many system resources to work. But what if there were a DietPi version for laptops and desktops? I never thought of DietPi making a version for x86 systems, but it exists, and I was eager to try it on my old laptop. I previously installed AntiX on the laptop and liked the experience, but I didn’t expect the same from DietPi’s x86 version.
Like AntiX, DietPi’s utilities are why I prefer it over Raspberry Pi OS Lite, as they help me get so much done without being a terminal wizard. But I was curious about the x86 version available for PCs.
Installing DietPi on an old laptop
It’s slower than I expected
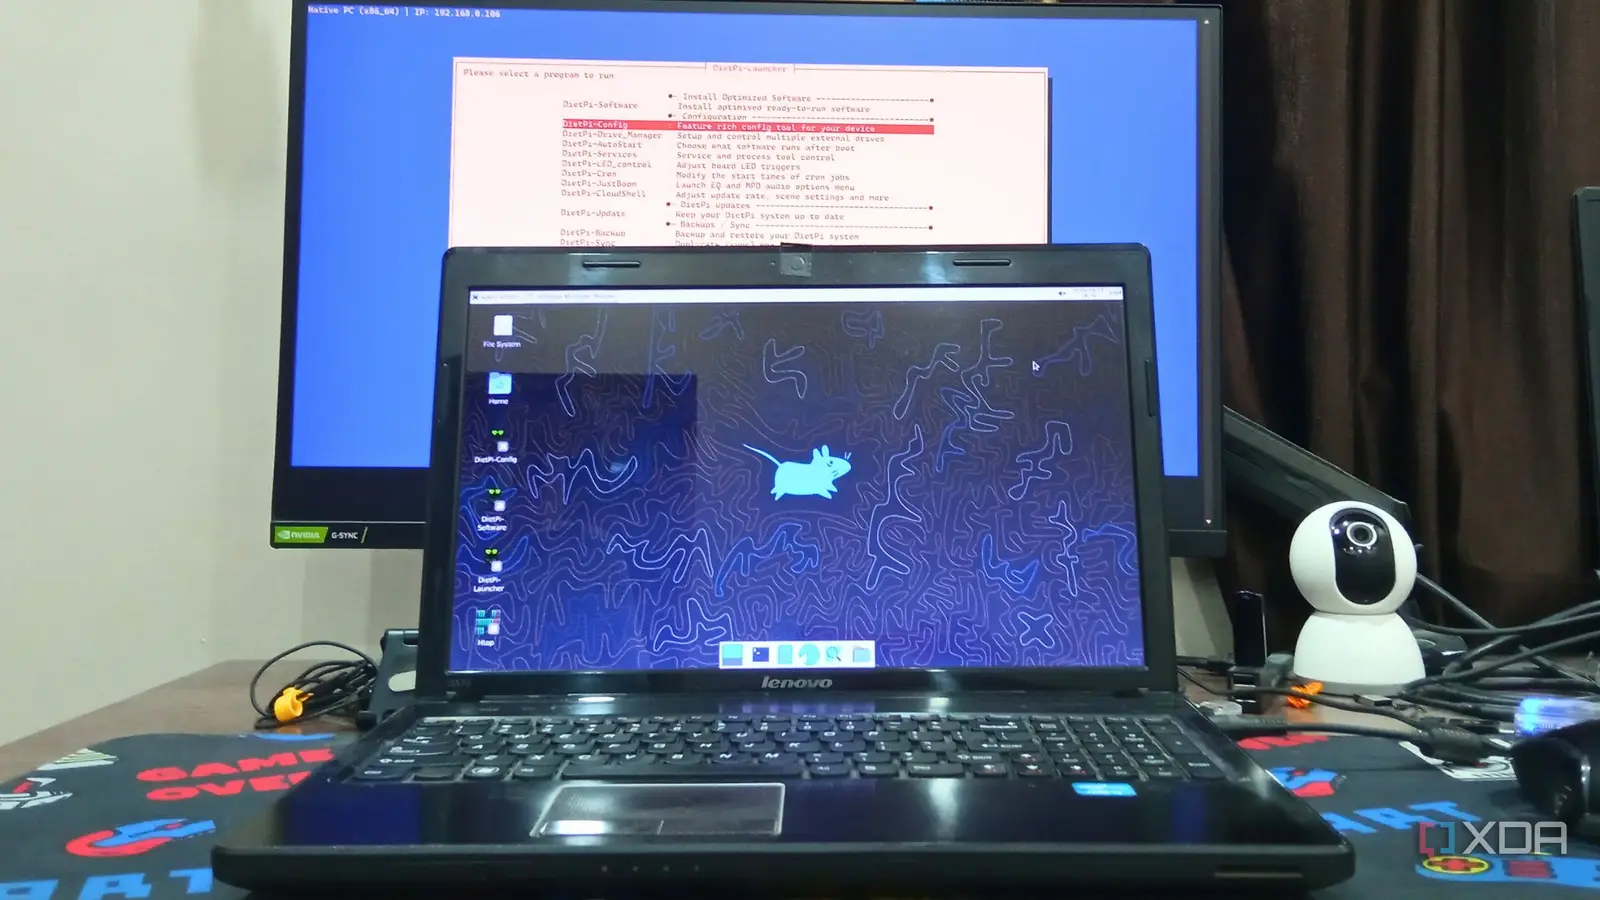
My laptop’s specifications aren’t great, as it’s a system from the early 2010s. It has a dual-core Intel i3 processor with 4 GB of memory and a SATA hard disk drive. It used to have a discrete GPU, but that doesn’t work anymore. So, I created a bootable USB drive with DietPi’s x86 version ISO file (BIOS). You can find it on DietPi’s downloads page.
Then, I selected the bootable USB from the boot devices menu, and it started installing the OS. I thought it would finish in a few minutes, like AntiX or MX Linux, but I had to wait more than 30 minutes for the installation. It’s way longer for a CLI-based operating system at its core.
After the installation completes, you get the same home screen with the system stats, temperature, and more. A bit more interaction is required to set up the Wi-Fi, region, and keyboard input, after which the OS tries to update to the latest version.
For some reason, DietPi didn’t connect to the internet after a reboot, and I had to manually configure the auto-connect settings to force it to recognize the network on boot. Otherwise, it would be impossible for me to control the machine via SSH.
I like the highly customizable nature of DietPi, including the software installation utility, which worked fine with app installs. I prefer it so much because installing complicated apps that need additional packages like NextCloud becomes a one-click effort. But I wasn’t happy using a CLI interface on a Linux distro meant for laptops and desktops. So, I went on to install a desktop environment.
Setting up Xfce in DietPi
Installing display drivers and configuring auto-start
Running a full-fledged desktop on a low-end Raspberry Pi would surely be a struggle, but it shouldn’t be a problem on a laptop. With this thought, I opened the DietPi-software tool to install a desktop. Xfce was the only one not marked with a “lightweight” tag, so I picked it and installed it on the system. It didn’t take long to unpack and prepare it, but nothing happened when I entered the startx command to launch Xfce.
Apparently, it’s a restart issue, and doing so once fixed the problem for me. After that, the startx command immediately launched the desktop environment. I also configured the autostart settings for Xfce, so I didn’t have to run the command every time. Now, my system boots to the Xfce desktop every time.
Xfce experience improves DietPi’s usability
It works better than my expectations
Like MX Linux, Xfce on DietPi looks manageable with all the desktop customization you need. You have complete control over the Xfce desktop manager and can change system, appearance, panels, sessions, and more settings.
Thunar File Manager is the default file explorer and has all the essential tools and actions. However, here’s where the fun stops. There is no pre-included tool to open text files, images, or deb packages. So, you must install a web browser, and other tools like Gimp and a media player. Even the screenshot tool is missing from the picture (pun intended), and I installed it to capture images for this post.
Once you set up everything, it’s not different from a regular desktop with a file management utility. You can open apps from the Applications button at the top, or use the search icon on the bottom dock panel. Every aspect of the desktop environment is customizable to your liking with ample window manager options.
I surely miss the treasure trove of MX Linux tools and tweaks, but DietPi has a solution for almost anything. It’s not a GUI form like MX Linux, but it doesn’t require you to run long command sessions. DietPi’s most useful utilities list includes DietPi-software for installing pre-configured apps, backup and restore (for obvious purposes), a cleanup utility, and a drive management utility for mounting drives and formatting, among others.
DietPi’s whiptail menus for modifying the above system settings look outdated in the Xfce environment. But it works as intended, and I successfully backed up my system, installed multiple software programs on the laptop using the tool, mounted and copied data to the USB drive, and even ran self-hosted services like DietPi dashboard without any problems.
After installing Xfce, it consumed about 300 MiB of memory, which is not bad compared to other frugal-resource distributions like MX Linux and AntiX. Web browsing and YouTube playback didn’t push it to its limits, and now the laptop can act as a secondary system and double up as a self-hosted services machine.
Xfce is better than the boring CLI
DietPi is a CLI-focused Debian OS, but the x86 edition deserves a desktop environment. You must install additional tools to bring it closer to a full-fledged desktop distro experience. The pre-installed DietPi tools make the job easier, and the operating system runs without any hiccups afterwards. Do give it a try on your old laptop.