Copyright shacknews
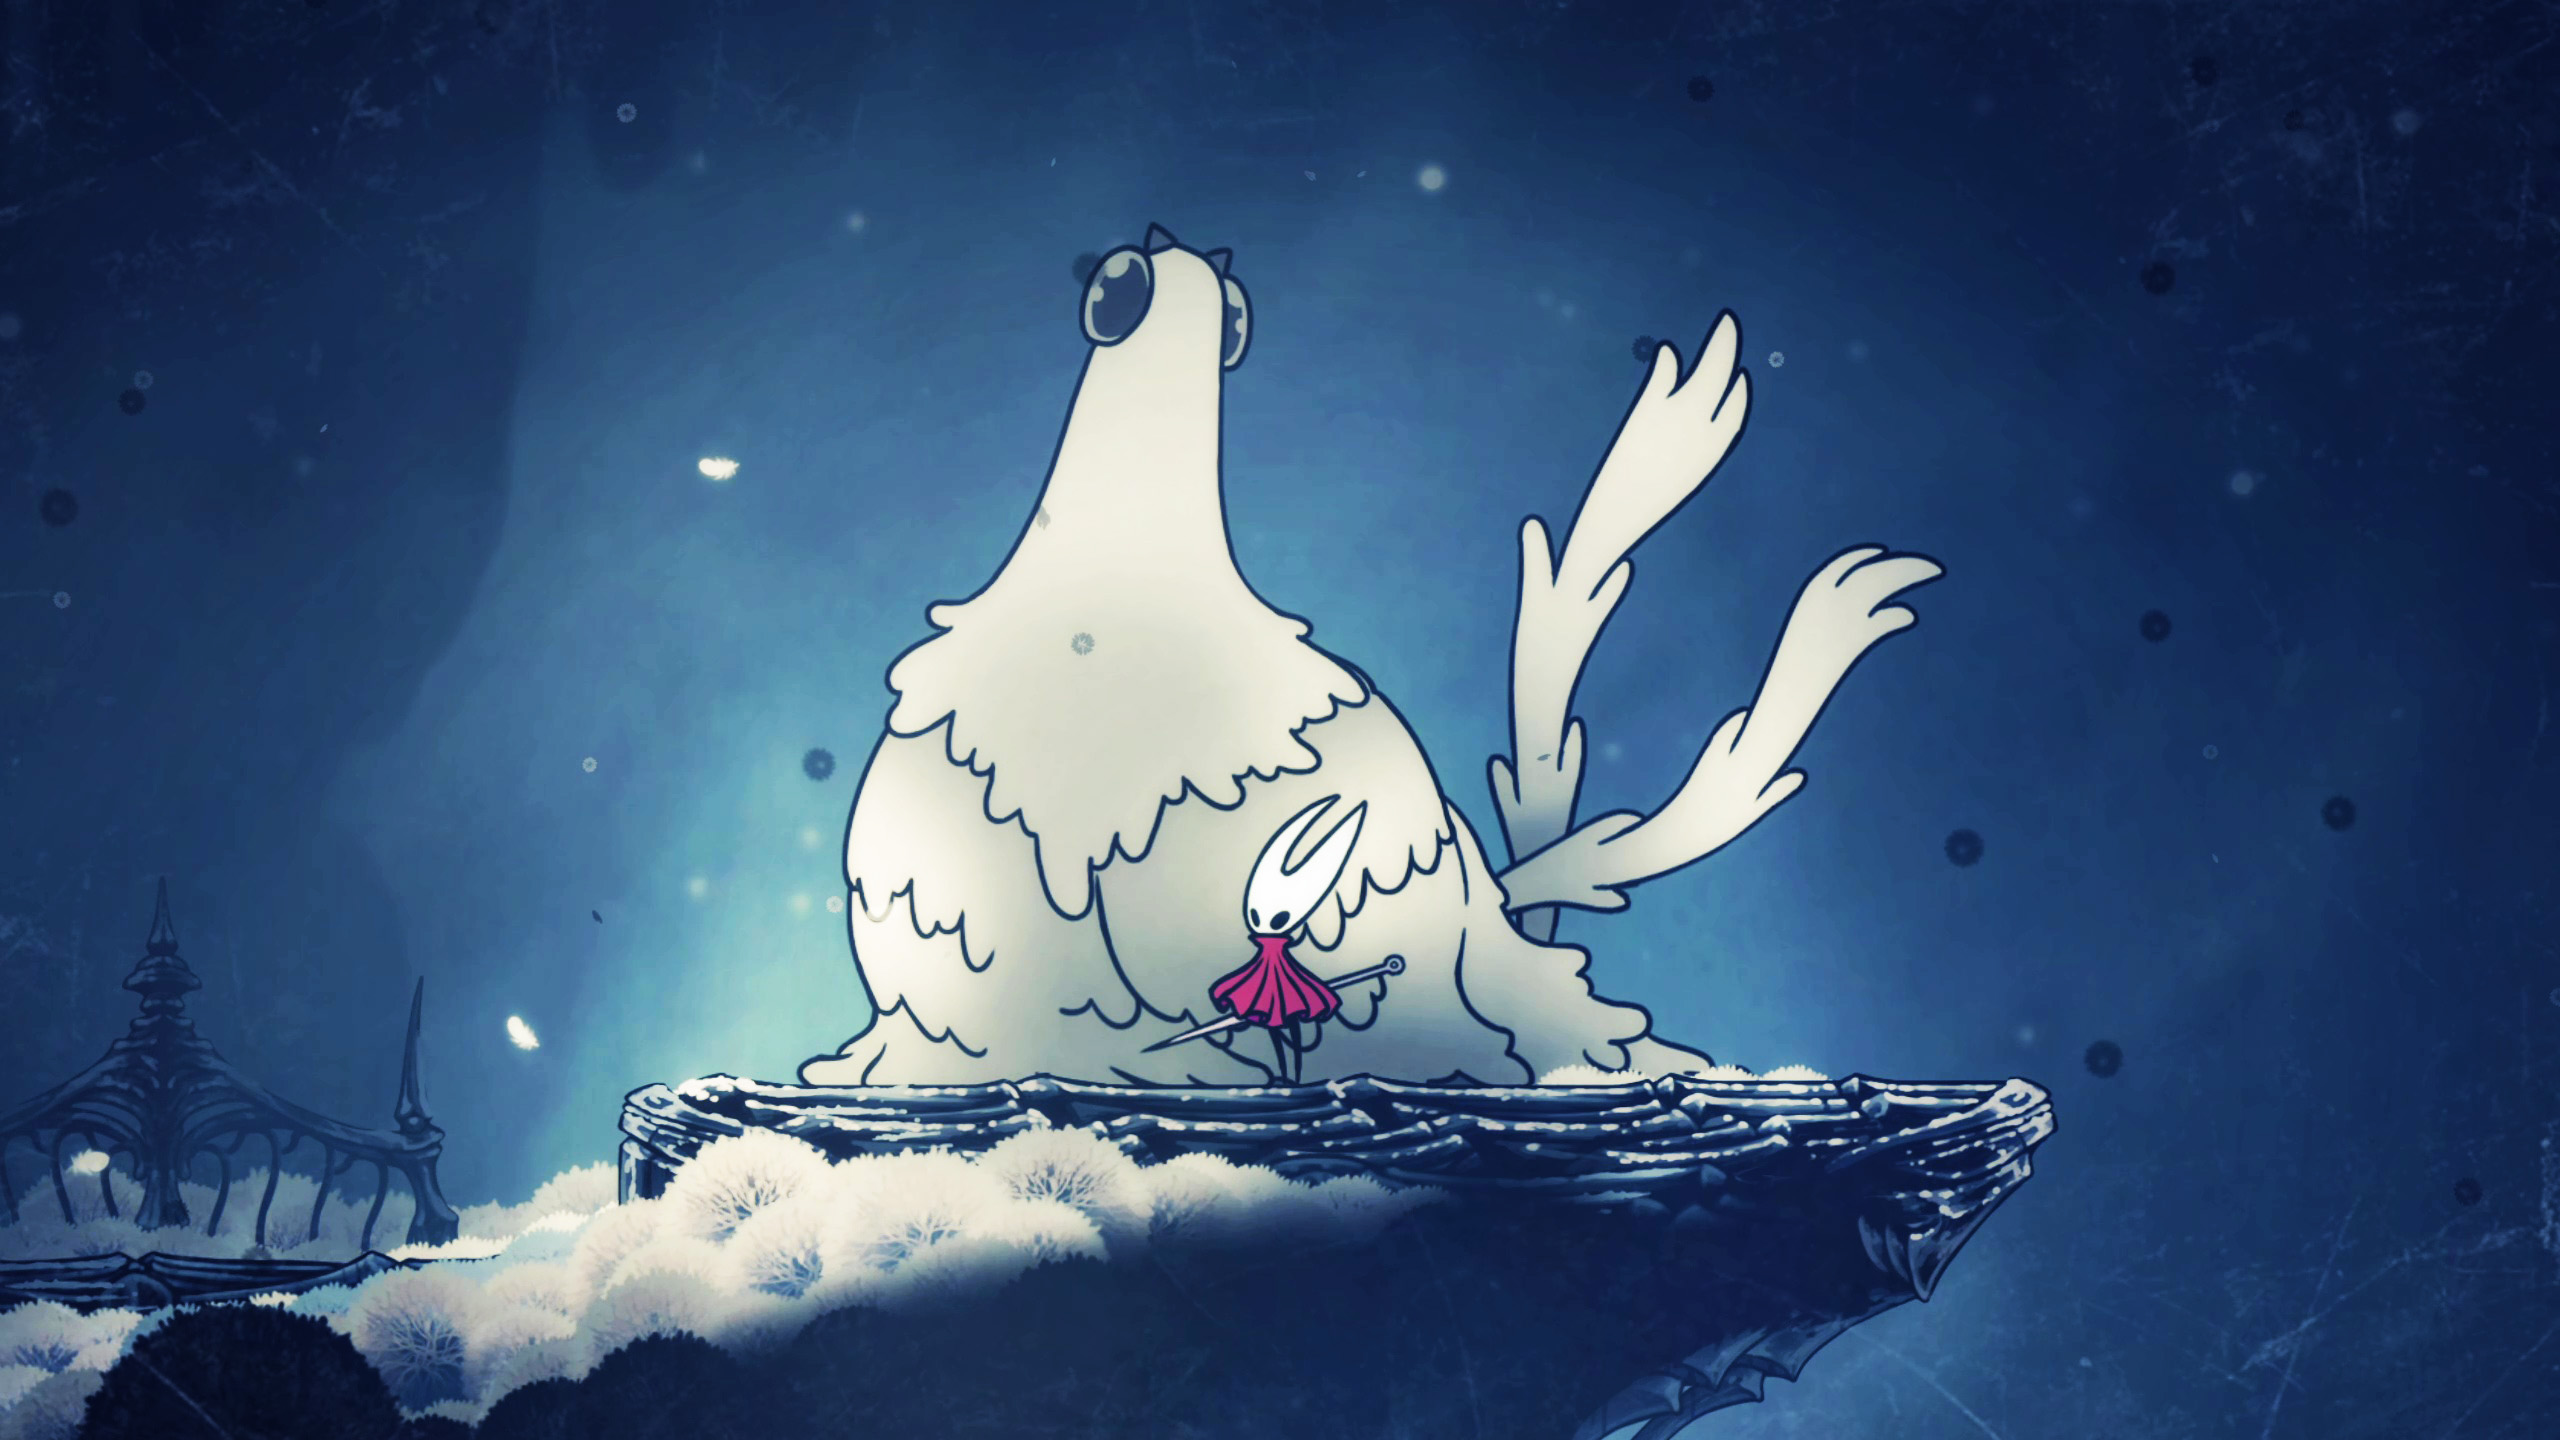
Traversal is at the heart of the gameplay loop in Hollow Knight: Silksong, and what better way to make the platforming more consistent and comfortable than with a double jump? That’s what the Faydown Cloak provides, but you’ll only find it at the peak of one of the most inhospitable places in a game already full of them. Check out our HOLLOW KNIGHT: SILKSONG INTERACTIVE MAP. Where to find the Faydown Cloak in Hollow Knight: Silksong You get the Faydown Cloak that unlocks double jump at the highest part of the Mount Fay region. You’ll need the Needolin to activate the tuning device there, at which point Hornet will be able to harvest the Faydown from the massive fluffball that descends from the sky. Big fluff is big friend. No boss fight here. And there are no boss fights for a reason, because Mount Fay is a massive platforming challenge that can easily take longer than even the hardest fights in the game. You can’t reach Mount Fay until a ways into Act 2, and you have access to the lower reaches of the Choral Chambers. To get there, head west through the chambers until you reach a thin, tall room. Go to the bottom of the area and continue west (left), past the pit of spikes. If you’re going the right way, you’ll see a sign with a cage symbol on it, much like the one near where Grindle was locked up in The Marrow. Keep heading left, across the great bridge, and through the dingy, blue-tinged room with the hanging cages. Here, you’ve arrived at The Slab, Pharloom’s prison of the damned and forgotten. You might have visited The Slab unintentionally after being captured and imprisoned there. If that’s the case, you’ll need the Key of Heretic to open the floor at the bottom of the main column. Continue down through the Slab’s lower reaches until you reach a Bellway, and be sure to grab the resting bench to the right of the Bell Beast’s nest. Once you do, travel west, past the Beast, and you’ll be in Mount Fay. The mountain is a cold, desolate place, entirely free of traditional enemies. Staying too long in the frigid air will cause you to literally freeze to death, as noted by the blue tinge your health bar masks will gain. Until you have the Faydown Cloak, there is no way to avoid the chill besides sitting near a fire or heating lamp. Use the Clawline to cross the initial gap, and continue left until you meet Shakra at a small camp. Rest with her and the area map if you have the rosaries. There’s a long climb ahead. We’ll present it as a list of steps for easier reading. How to climb Mount Fay and get the Faydown Cloak Shakra is our starting point, and there’s a lot to do. Jump left, across the superchilled water to the small platform, then jump up and to the right twice to reach the first heating lamp. Continue right and jump up through the collapsing blocks, returning to the lamp if you’re not fast enough Use the Clawline to grapple to the floating enemies, then to the hanging ring. Jump over to the wall to your left and up to the platform. Next, jump off the collapsing block to reach the next cling wall to your left and the first heating lamp you’ve seen in a while. From the lamp, jump across the gap to the left, then you’ll need to navigate through three tight jumps lined with spikes before you can head back to the right. When you reach the top of the spike area, use the Clawline to zip through to the other side. Slide down the wall on your left, quickly touch the heating lamp, then jump across the gap to the wall to your right. Use the Clawline to reach it if necessary. Continue up, grappling to the first two flying enemies to reach a platform, then turn around and grapple back across over the spikes. Keep going up until you reach a large bit of solid ground covered in fluffy snow. Now it's time for the next section of the challenge. Go left from the heating lamp, through the hallway, and, when you reach an icy chasm, start floating down, taking care to avoid the enemies. Take the path that appears on your left about midway down the column. Top off your silk and head through the hallway, past the laser eye enemy, until you reach a chamber with only superchilled water for a floor. Grapple to the first enemy, glide to and grapple onto the next. Continue grappling enemies as you make your way to the left. You’ll eventually reach a door. Keep heading left and head pay the rosaries for the resting bench, then unlock the path upward. Time for part three of the climb. From the heat lamp, jump up and to the right, using the grapple enemies to bounce onto the floating platforms. Jump up and left from the second platform, opening your cloak at the apex of your jump to ensure you can grapple to the next enemy on your screen. Shoot over to the hook, then grapple to the left enemy, then the one all the way to the right. Keep heading right until you reach another floating platform and can jump to a wall with a heating lamp. Beware of landing on the hillside, as you’ll quickly slide all the way down. Wall jump your way up and use the Clawline to go across through the spiked gap like you did earlier in the level. You’ll next need to be very quick with your grapple onto the floating enemy to the right. Keep heading right, and this time you do need to ride the hillside down to a heating lamp and another ice water section. Go through the right-hand doorway, then glide down through the spike chasm. Grapple over to the ice enemy before you touch the water, then continue right until you reach a collapsing wall. Jump off the wall, grapple to the enemy, then repeat the process on the other side. You can actually cling to the wall of silver crystals near the exit platform, so use them it to jump across to the heating lamps and proceed. Here, you’ll need to cross another ice water chamber, being careful not to let the falling stone mess you up. Top up your Silk once again, jump the gap you passed what likely seems like ages ago, go by the laser eye enemy, and drop through the platform to open up a shortcut. Use the rings and floating enemies to grapple up until you see a wall you can cling to on your left. Grapple to it and head up to the next screen. Once in the open air again, head all the way to the left and bash open the cracked stone wall to reveal a hidden resting bench. Cling onto the wall just outside the bench and grapple across to the ring. Jump back to the left and repeat the process until you see the snowy slope again. Get to the highest point on the wall, then jump across and grapple to the hanging ring. Next, grapple left and head up and across the spikes, floating down until you can grapple to another enemy over to three collapsing platforms. Wall jump up twice to reach the small Silk webs, then continue left until you reach a heating lamp in the wall. Jump off the wall and grapple onto the enemy, off the collapsing wall, back left over the small spike hole in the wall, and then back right to the floating enemies and off another collapsing wall. Make it to the final wall to your left and up through the gap to the next screen. Slide down the hill to your left and ride the air current all the way to the top. Glide to your right and, once you’ve landed, keep walking until you reach a tuning device. Play your Needolin until the biggest, fluffiest bird comes down to say hi. The screen will fade to black as Hornet pulls a few puffs from the Fayforn bug and adds them to her cloak. Congratulations! Now you have the Faydown Cloak, can double jump, and are immune to the freezing air of Mount Fay. Nothing worth having is had easily, I suppose. For much more on Hollow Knight, check out our dedicated game page.