Hollow Knight: Silksong’s double jump ability can completely change your ability to move around the map and fight enemies, but it isn’t that easy to find or unlock. You’ll need to make some headway into Act 2 before you can go for this upgrade, and getting access to it also requires some other movement abilities.
The double jump is provided by the Faydown Cloak, a feathery addition to Hornet’s ensemble that gives her a bit of extra lift. To acquire this upgrade, you’ll need to get the Clawline before heading to the Slab to access the Mount Fay area. Beyond that point, there’s a lot of tricky platforming you’ll have to do, but it’s nothing that you can’t handle if you’ve made it this far.
How To Get To Mount Fay
If you don’t already have the Clawline, you’ll have to take care of that first. First, get the White Key from the Songclave area in the Citadel. Then, head down into the depths beneath the Choral Chambers to find the Clawline in the heart of the Whiteward area. For detailed instructions, you can follow our Clawline location guide to the destination.
Once you have the Clawline, head to the Slab to the left of Choral Chambers. If you’ve unlocked the Bellway location there, you can fast travel. Exiting the Bellway to the left, you’ll find some hooks that you can Clawline across to enter the Mount Fay area.
Make sure you have a Rosary string of 60 beads on you for later, as you’ll need it to unlock a very useful bench before getting the Faydown Cloak.
Here, you’ll meet Shakra at a bench area. Rest at the bench and buy the map from Shakra if you have the Rosaries to spare.
How To Climb Mount Fay & Get The Faydown Cloak
From here, your platforming ascent begins. Jump up the platforms to your left and exit to the right above. Outside, use the jump and clawline to ascend some platforms and enemies. On the first stage of the ascent, you’ll likely lose a bit of health to the cold before you reach the first warm area, but it’s nothing you can’t tank.
When you reach the top of the first ascent, head inside to the left. Continue that way, Clawline jumping off of enemies to cross a frigid lake area. If you fall, keep jumping, using your Clawline, and moving, as you might still be able to make it across before you freeze.
In the next area, you’ll find a sign for a bench. Head out the exit to the left of the sign, drop down, and break the wall to access a bench. At launch, this cost 90 rosaries to unlock, but it now costs 60, so a single Rosary string will do the trick. Rest here before continuing.
Ascend through the top of this room and continue your ascent outside. When making these jumps, avoid double-tapping too quickly, as starting to float with your cloak will limit the full height of the pogo boost that you need. Clawlining enemies will give you a jump without a second press.
Make your way to the platform on the upper right and float down through a spiky corridor to the next warm spot, where you’ll start Clawline jumping from enemy to enemy again through a couple of areas.
Eventually, you can break a wall on the right that opens up easier access to your current location from the starting bench. Try not to die, though — you’ve got just one more ascent until the next bench. When you reach the area above, break the wall to your left to access a bench and rest there.
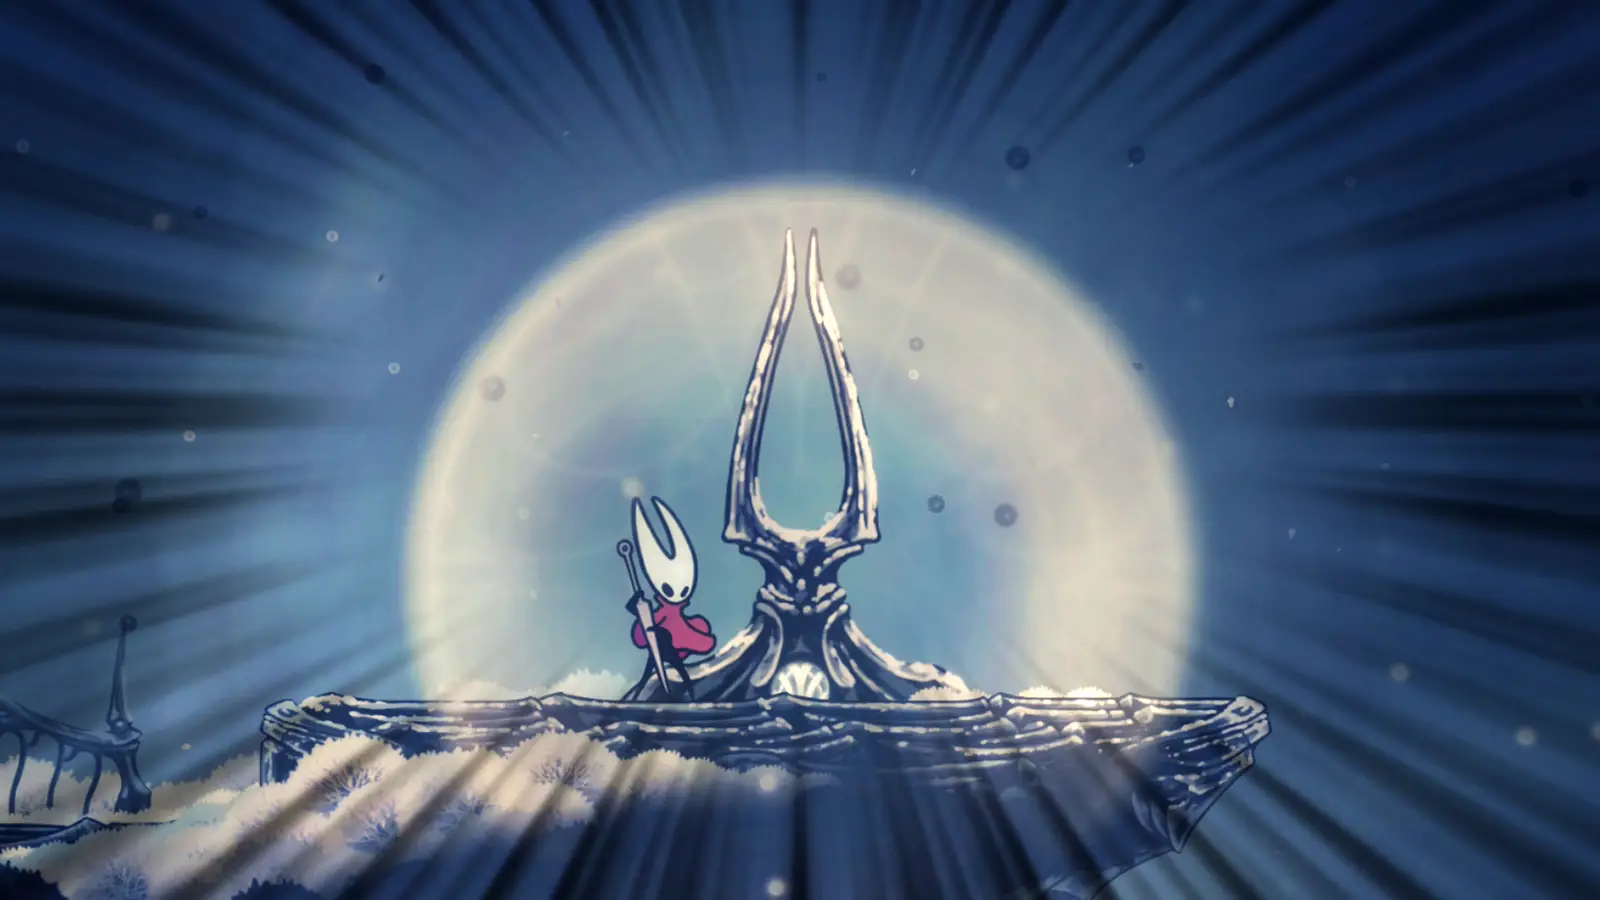
After one final platforming ascent, leap up into the next area, go left over the spikes, and take the air current upward. Move fast throughout this area, as wasting any time here could quickly freeze you. Head to the right, inspect the tuning mechanism, and play your Needolin to summon the large avian creature that will give you the Faydown Cloak.
How Double Jump Works
Once you have the cloak, you can make double jumps by pressing the jump button again while in the air. After that, you’ll need to press and hold an additional time whenever you want to slow your fall. The Faydown Cloak will also keep you warm, although that might have been more useful before the ascent than after.
This should open up new areas for you, as well as potentially making some challenging Act 2 fights easier. Before you leave the Mount Fay area, you can now descend the leftmost slope to find the Mask Maker NPC. You won’t get any items for doing so, but it’s worth meeting the character, and you can later accept a difficult quest to deliver an item to the NPC.