In Baldur’s Gate 3, “Rescue the Gnome” is a simple Act One sidequest that can have reverberating consequences throughout the entirety of the game. You can technically begin this quest from the moment you complete the tutorial, as it’s readily available and located only a short distance from the starting area.
However, like most Baldur’s Gate 3 sidequests, “Rescue the Gnome” ties into a game-long storyline that extends far beyond the initial confrontation. Here’s everything you need to know about starting this quest, completing it satisfactorily, and responding to its ripple effect throughout the rest of the world of Baldur’s Gate 3.
“Rescue The Gnome” Quest Location
How To Start “Rescue The Gnome” In BG3
In order to start “Rescue the Gnome,” you’ll want to head to the map point indicated above. It’s located within the Blighted Village, which is just east of the Goblin Camp, southwest of the Emerald Grove, and far northwest of the Nautiloid crash site.
Once you get to the Blighted Village, head to the northwestern part of the area. You can either start from the fast travel point and walk west, or follow the path up and around. If you see a windmill, you’re headed in the right direction.
“Rescue The Gnome” Quest Walkthrough
How To Free Barcus From The Windmill
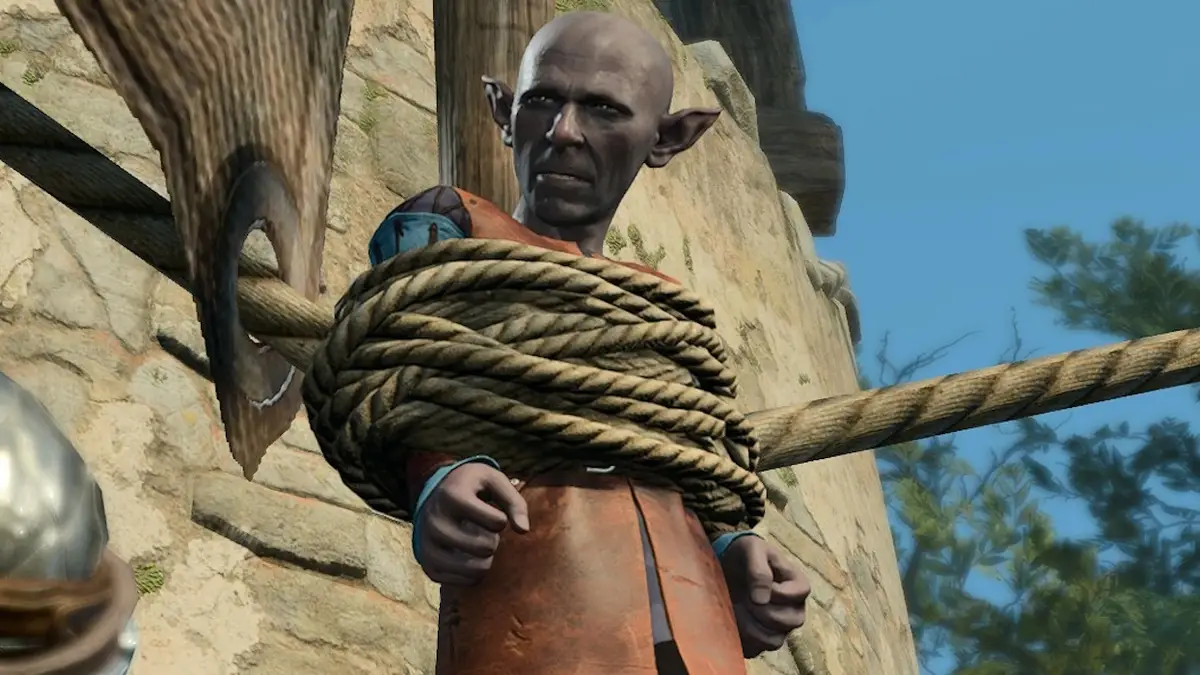
As soon as you enter the windmill area, you’ll be accosted by the goblin Fezzerk and his little gang. Through this cutscene, you’ll get a brief introduction to the scenario: Fezzerk and his friends have raided the village and tied Barcus to one of the blades of a spinning windmill. They’re not happy that you’ve interrupted their fun.
Although dialogue options may vary based on your race, class, and other character choices, you essentially have four options here:
Talk your way out: You may try a variety of speech checks to convince the goblins to leave the area peacefully. This is significantly easier if you’ve already visited the Goblin Camp and accepted the Brand of the Absolute, or if you’re playing as a drow.
Bribery: If you simply ask to pass, Fezzerk will demand 1,000 gold pieces. You may attempt to haggle him down; Fezzerk’s limited knowledge of math will cause him to set the price at 5 gold, no matter what you choose.
Use your Illithid powers: By far the easiest option, with a difficulty class (DC) of as little as two regardless of character or class.
Fight the goblins: You can simply choose to attack the goblins at any point during the conversation. The fight isn’t difficult — once Fezzerk’s HP gets low, all the goblins will run away.
Of these options, I wholeheartedly recommend using your Illithid mind control powers to convince Fezzerk to leave. Using your Illithid powers sparingly shouldn’t affect the story, but do note that you can usually only choose a tadpole mind control dialogue option once per long rest.
No matter what you choose, it’ll ultimately result in Fezzerk leaving the area, opening the way to the gnome tied to the windmill. Speak with him, and you’ll learn that his name is Barcus Wroot, and he very badly wants to be let down.
Walk around the windmill, and you’ll see an opening in the back. Go inside to find two levers (hold Left Alt/Right Stick to highlight them if you can’t find them):
“Release Brake” Lever: Pulling this causes the windmill to spin faster, loosening Barcus’ restraints and flinging him to his death. You can later find his body lying on the road west of the Blighted Village.
“Brake” Lever: Pulling this causes the windmill to stop. You may then untie Barcus by walking around and interacting with him again.
Either way, pulling one of these levers puts an end to the quest. If you simply leave without interacting, Barcus will die and the quest will end automatically shortly thereafter. Neither option is without its pros and cons, but there’s a clear best choice.
Should You Free Barcus Or Leave Him Alone?
You Should Rescue Barcus
No matter how you approach it, saving Barcus is the best choice for your Baldur’s Gate 3 playthrough, even though it’s a little funny to send him flying. It’s certainly the ethically correct decision, but its pros go far beyond the sense of moral superiority.
If you save Barcus, he’ll give you the contents of his bag as a reward; you can find it in the basement of the windmill. Perhaps more importantly, he’ll also explain that he’s searching for a missing friend by the name of Wulbren Bongle.
This opens up an entirely new questline that you can follow throughout the rest of the game, repeatedly saving deep gnomes from trouble. You don’t necessarily need Barcus around to experience this questline, but he is an integral part of it.
You can also rescue Barcus again later, when you reach the Grymforge. Doing so unlocks him as a merchant at the Last Light Inn during Act Two, where he sells several unique items, including the Ring of Geniality (which adds a +1 to all Persuasion and Deception rolls) and the Acrobat Shoes (which give you a +1 to Acrobatics and Advantage on all Dexterity saves).
It’s there that he’ll give you another quest, “Rescue Wulbren,” which you can complete as you explore Moonrise Towers. As a reward, you’ll receive the Brilliant Retort, a powerful bomb that can help you get out of all sorts of sticky situations.
Finally, you’ll find Barcus again during Act Three in Angleiron’s Cellar, an underground area of the Rivington map. He’s changed his tune on Wulbren now, and, if you fulfill his request and convince him to lead the Ironhand Gnomes, he’ll even come to your aid against the game’s final boss.
You can still experience most of this questline if you let Barcus die, but you’ll miss out on his shop inventory and his role in the story. The only unique reward for killing Barcus is the loot you find on his body, and nothing in there is worth the sacrifice.