The ESP32 has emerged as a favorite tinkering device in the maker and hobbyist world thanks to its low cost, built-in Wi-Fi and Bluetooth, and strong community support. One particular strength it has is its expandability, including its use as a driver for simple displays. With an ESP32, you can turn any old cheap screen into a custom display for whatever data you want to show, and with open software, you can build displays suited to your needs.
Even better, because the ESP32 is so flexible, you aren’t locked into an individual ecosystem, set of cloud services, or preset layouts. You build it exactly the way you need, completely offline if you want, and even design how it looks. Displays can go for as little as $5, making these projects incredibly accessible.
Whether you’re interested in home automation, media control, system monitoring, or just a clean, glanceable interface for productivity, there’s an ESP32 display out there that you can tailor to your needs. I’ve built a ton of different ones over the last few months, and these are some of the most practical and interesting that anyone can build. Most of these can be built using ESPHome and Home Assistant.
Smart Home dashboard
Basic controls with ease
One of the best and most simplest use cases for an ESP32-based display is a smart home dashboard. Touch or non-touch, it doesn’t matter, as a basic display can be used to show information from anything you’ve connected to Home Assistant. I’ve built multiple versions of these, including ones that allow me to control my lights and music.
Under-the-hood, ESPHome powers the entire thing, and I used LVGL within ESPHome to draw my buttons. Everything routes through Home Assistant, and I can control my lights in my office, the music playing at my PC, and see statistics from other devices.
Because you control the interface, you can expand it to your heart’s content. You can add a weather panel, a system monitor, or even an RSS feed. The ESP32 Cheap Yellow Display is a great way to get started, but the bigger the display, the more information you can densely pack into the one screen.
Spotify “Now Playing” dashboard
You can even have some fun with it
If you want a nice, easy way to see what’s currently playing on Spotify, an ESP32 display is a great way to achieve just that. Paired with Home Assistant linked to your Spotify account, you can pull track information, album art, and even pause, skip, or go back to the previous track.
If you want to show album art on the screen, you’ll need to be aware of the specifications of your ESP32. The big problem here can be PSRAM, as you’ll need enough contiguous RAM (available RAM in a single block) in order to actually display the image. For devices with less PSRAM, such as the WT32-SC01 Plus, I’ve had to deploy a small Python server that acts as a proxy to resize the image and serve it locally.
Because the setup is (mostly) local, you get a dedicated music display without depending on any extra apps. You can even tack on additional information as part of the display, such as fun facts about the currently-playing track.
A personal voice assistant display
A challenging but rewarding project
A local voice assistant display is a considerably more advanced but rewarding project, and the results can be incredible. I built my own voice assistant display using the Elecrow CrowPanel Advance 7-inch HMI ESP32 AI Display, and it works perfectly. This is one of the most expensive items on this list, and will set you back about $50.
Right now, my port from the ESP32-S3-Box-3 doesn’t show the text recognized or the textual response, but you can easily implement that, or even just use it as-is. The visual indicators will show when it’s at rest or when it’s listening, and you can easily expand it to add more functionality, turning it into a true Google Nest Hub replacement with calendar integrations and more.
This is a considerably more complex project than a simple smart home dashboard, but if you can get it working, it’s an incredible project that works shockingly well. Powered by Home Assistant, ESPHome, and my local LLM, it’s been one of the best projects I’ve done yet.
NAS monitoring display
Stats at a glance
If you run a NAS, home server, or even just a PC, you can use an ESP32-driven display to monitor system health in real time. Things like CPU usage, RAM, disk usage, power usage, and more are all possible through the various integrations for TrueNAS, Proxmox, and others in Home Assistant. You can then mount it on your rack, server shelf, or desk for an instant at-a-glance view of what’s going on.
The data is collected via those integrations, which the ESP32 reads and can format and display on the screen. You can update it to add graphs or even scrolling text, and it’s helped me spot when something is wrong with one of my servers as I can see if the power usage spikes. I don’t need to keep an eye on it when I’m on my PC, and I can see it even if I’m just walking by.
Better yet, this is a considerably more compact and power-efficient option than dedicating a full secondary monitor for system stats, yet still allows you to see what’s going on at any given moment.
E-ink productivity display
Still one of my favorite projects
This type of project was one of the ones that got me started with ESPHome, and it’s an e-ink (ePaper) display powered by an ESP32 for a low-power, always legible productivity dashboard. I keep the weather, the temperature of my living room, and the work I need to complete printed on it for that given day. With a Google Calendar integration, it also shows me what time my next call is if it’s on that day, and what the name of it is.
The beauty of these displays are that they only consume power when updating, so they can remain on indefinitely without burning much energy. The ESP32 is a different matter, but with the “deep_sleep” component in ESPHome, you can essentially “shutdown” the ESP32 in intervals to extend the battery life. Mine lasts over a week on a single charge thanks to it.
There’s so much more I could do to expand this, pulling from Slack, my personal to-do list, or even pulling from an RSS feed. Yet it’s still been one of the most “static” aspects of my smart home. It sits on my desk every single day, and helps keep me on task in a way that a second monitor wouldn’t.
LED matrix display
An eye-catching addition to your smart home
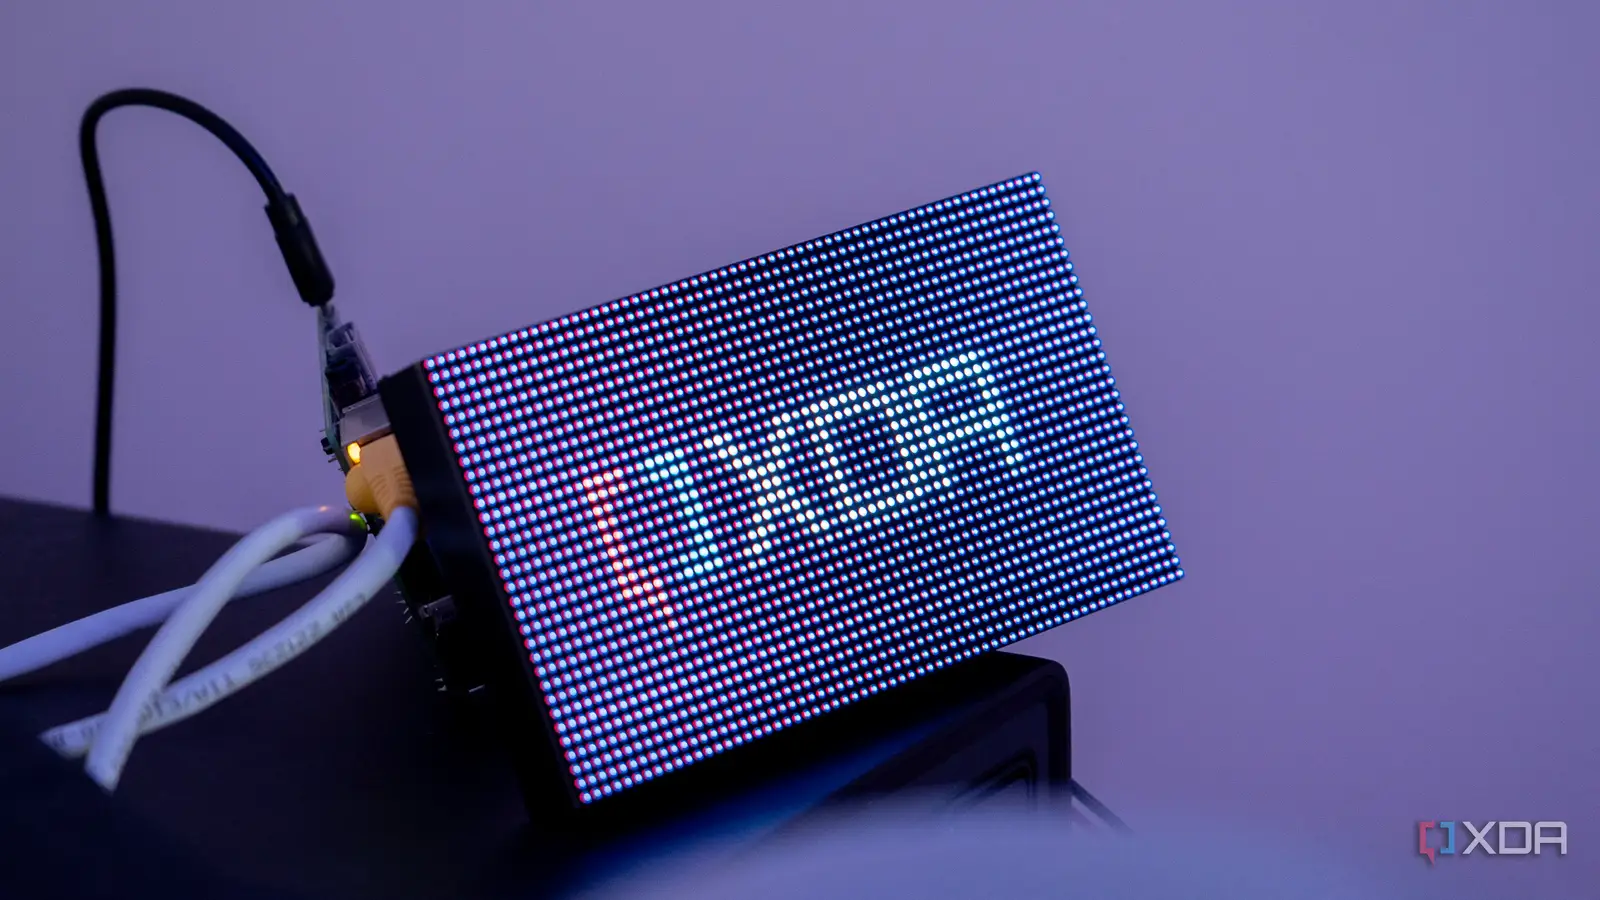
Another personal favorite of mine is an LED matrix display, as it’s unique while still being capable of doing a lot. I built a basic ESP32-powered 64×32 panel a while back, and you can build it with ESPHome using a wrapper library for the HUB75 controller, or you can use the HUB75 library directly and develop using PlatformIO or Arduino.
With this, you can display images, clocks, text banners, or even scrolling text. You draw straight to the display, and the HUB75 library will handle everything for you. LED matrix panels are visually more appealing than a regular LCD, though significantly more complex with a pretty hefty learning curve.
The other downside is that the ESP32 is quite weak in comparison. Its Direct Memory Access (DMA) capabilities are what makes this possible, and the limited RAM still prevents you from chaining too many panels. Still, a single panel can look great, and it’s a fun project to help you learn even more about the ESP32.
ESP32 display projects are great
All these projects share some common advantages, namely the cost, flexibility, and the control they grant you. An ESP32 board is cheap, and there are so many different kinds of screen out there that are affordable. No matter whether you go with a TFT, OLED, e-ink, or LED matrix display, they can all be quite affordable, and the total build cost often is a fraction of commercial smart displays.
The only thing to consider is that full ownership of the software stack is both a good and a bad thing. It’s good in that you decide what to show, when to refresh, and where the data comes from, but you also are the person who maintains and builds it. You don’t have a dependence on the cloud or a subscription, but you have to be willing to put in the time to make it all work. Projects on GitHub are a great starting point to learn, and that’s where I began.