By Ali Hashmi
Copyright primagames
After the charming LEGO Builder’s Journey in 2021, Light Brick Studio is back with another creative and visually stunning co-op adventure, LEGO Voyagers, starring two bricks who must work together on a voyage through lush forests, sandy deserts, and giant factories.
With more than 30 chapters full of puzzles, our complete LEGO Voyagers walkthrough is here to guide you if you get stuck and more!
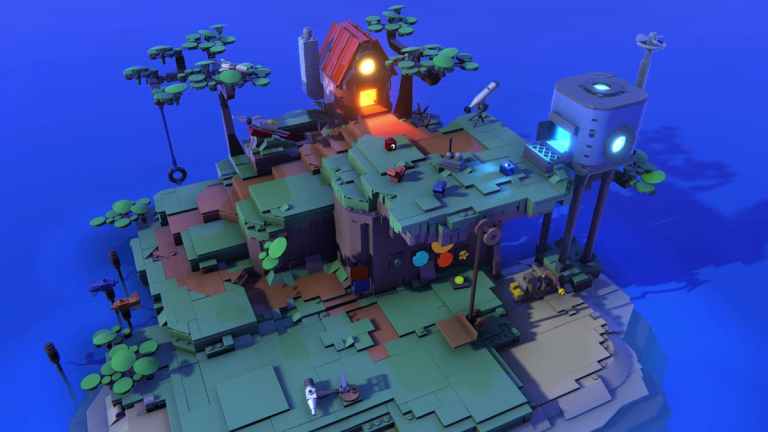
The first chapter doesn’t have any puzzles, and it’s more about familiarizing yourself with the controls. How your blocks move around, and what parts of the world they can attach themselves to. You can interact with several parts of your little island, and eventually, you’ll need to head back to your individual cabins. Once you wake up, approach the chairs to initiate the cutscene and set things in motion.
In Chapter Two, you will need to perform some basic brick connecting to create paths. Approach a brick and press B/Circle to get on top of it or snap to it, and then B/Circle again to fit it in place. You can add more bricks to an existing brick by pressing B/Circle while you’re combined to it. It’s easier than it sounds.
In most cases, you can tell that a brick can be combined with your character or other bricks if it isn’t part of the surface.
Tip: You can essentially snap to a combinable surface by pressing B/Circle, and move around those parts much faster by moving around in that state.
Chapter three continues the trend of creating paths between two platforms.
Here, you can interact with a few parts of the rocket wreckage until you reach the tip of the rocket and amusingly fall with it.
In Chapter Four, you’ll encounter a structure with a yellow brick attached at the start. Every time you see this, attach to it and pull to bring the structure down to create a path forward. This happens twice in this chapter!
Next, there are two more brick connecting sections. The first one requires you to make a path between two platforms, and in the next one, you need to grab a few thicker bricks from the left and create a platform to climb.
Moving on, you’ll need to dismantle another structure with a yellow brick and continue north.
After some light platforming, you’ll need to navigate across a gap with a pipe protruding from it. Here, you need to combine with your partner and use the weight of both to sway towards the right.
This is a short and straightforward chapter. After sliding down the rails, you’ll come to a water area with tall stick-like platforms. Jump onto them and use snap with Circle / B to cross.
Tip: The snap function makes it easier to navigate sections with multiple attachable points. Always use it instead of manually timing your spacing and jumps.
Chapter Six starts with a large tree in your direct vicinity, and one of you needs to attach to it and shake off the purple bricks.
The other player can then use the dropped purple bricks to form a long line-type structure.
This can be moved around with the movement stick and allows you to climb the first obstacle.
Take turns and make your way forward until you approach a bridge-like platform connecting a path. This will break down while dropping a few individual bricks in the process.
Attach to a brick and combine with more by pressing B/Circle a few times to form a structure. Move this new structure back to the bridge and create a new path to get across.
The rest of the chapter contains light platforming and no tricky puzzles.
At the start of Chapter Seven, you can interact with some wreckage with yellow parts. This is to teach you that if you see a small yellow round plate, it can be used to turn a mechanism.
As you move through the chapter, you’ll need to turn these yellow parts to flip the orientation of plain platforms. This is usually required to open up paths for your partner.
You can also use it to propel your partner away to reach places they can’t by jumping.
Tip: If there is a platform that is supposed to propel your partner to the other side, ask them to stand on the white markings.
Now we’re finally getting somewhere. Chapter eight starts with a fun, but simple puzzle, which is about weight distribution. When you enter the opening area with a few platforms, you’ll see a few bricks lying around.
One of you needs to control the platform mechanism while the other grabs at least two of these bricks.
Propel the player with the bricks to the other side and then use the bricks to lower the platform on the left. Once that’s done, you can both get to the other side!
Moving on, you’ll do some simple platforming and use the mechanics you’ve learned before. It’s pretty basic, and you should have a good grasp on these by this point.
Next, the game has something new to teach you! You can actually attach bricks to the yellow bricks that control different mechanical structures.
So, first, attach yourself to this piece of brick, and then attach that to the yellow mechanical structure in the state you want it to be in. This will keep it locked in the position you’ve set it in, creating a path for you both to use and move forward.
After that, it’s a few simple platforming sections that you can get through and enjoy the scenery while you do so!
Chapter Nine is another easy one, and you’ll start by pulling on a switch to extend a platform and use two more switches to propel each other forward.
You will eventually come across a broken path with some bricks attached to one side. These are important for the next chapter, so take them off and bring them along.
Chapter Ten introduces the idea of bricks, which can power up different structures, so let’s refer to them as Power Bricks.
Grab both of these, place them at the designated spot to open up the electrically powered gate ahead.
Once the gate opens, bring those bricks from the last chapter with you.
Continue forward, and you’ll need to power up a gate that is missing a power brick. That’s on the left side of this platform, for which you need to move three of the yellow switches to enable the platform.
Use the bricks from earlier and attach them to these switches to keep them in place, permanently lowering the platforms you need to cross to get the power brick.
Grab the power brick and take it to its spot on the right to open the gate.
Chapter eleven doesn’t have any complicated puzzles, and you need to get through a few simple platforming sections, which involve creating brick paths, using your weight to reach a different spot, and swinging across.
The bridge leading to the next area is elevated, and you can now bring it down by controlling one of the satellite dishes using the two yellow bricks. The one on the right raises or lowers the dish, while the panel on the left is used to control its horizontal rotation.
Position its round tip (the feed horn) on the right side as it touches the bridge and push towards the left.
This will lower the bridge, and you can continue on to the next area.
Make your way to the next area where you’ll need to open another electric gate. One of the power bricks is available close by, while the second one is further down.
Further down, you’ll need to gather a few bricks and attach one of those to the yellow switch so that you can create a path towards the platform on the right using the remaining bricks.
Once you have the second power brick, make another path back to the main platform using the bricks available here, and take the power brick back to the gate.
After that, you’ll be rewarded with a fun little rails section until you reach the next chapter.
Chapter 13 introduces the boat, which you both need to control at the same time. The switches at the back control the thrusters, while the switch in the front controls the lever-like structure. It is powered by a power brick, which can be found right of the docked boat.
Here is how you can control the boat:
If both of you push the switch to the furthest, it will move forward. If both of you push the switch to the back, it will reverse. If the player on the left thrusts forward, the boat will move to the right. If the player on the right thrusts forward, the boat will move to the left.
Here, approach the different buoys in the water area to collect bricks. You don’t need to manually bring each over, even dropping them in the water spawns them in the boat.
Head to the closed gate and elevate the lever. Use the bricks to form a structure to get on the bridge and open it by pulling on the switch.
After opening the gate, you’ll come across a few platforms where you need to grab power bricks from to open a gate at the end of this section. On the first platform, propel to the other side, grab the power brick along with all the loose bricks, and bring them to your boat.
Once you have the power and loose bricks, continue forward, but keep to the left to approach another platform. Here, use one of the smaller bricks to hold the yellow platform in place and use the rest to create a path towards the left platform. Grab the power brick and hop on the moving grey platform to make your way back to the boat.
After that, you’ll have two power bricks, which can now be installed in the final platform upstream.
You also need the third power brick from your boat. Use all three to complete the circuit.
Now push the yellow switches to connect the platform on your left and make your way forward!
Chapter sixteen is almost entirely narrative-driven, and you’ll work on your personal rocket ship. During the winter section, the blue brick needs to be inside the rocket, while the red one needs to sit on the yellow chair outside.
There are no puzzles in this, and it’s pretty straightforward.
Chapter 17 takes the young adventurers to the desert! Here, you’ll notice something different. The blue character is taller than the red one! The blue player must grab the seat to charge it and activate the drone.
This drone will hit the rock formation, and you’ll need to follow in its path.
After some light platforming, you’ll reach a section with a gap between two platforms.
Climb the rock formation above until you reach the grey brick where the drone is wedged in. This will cause the structure to collapse, freeing up some bricks.
Use these to create a path forward and go through the chapter using some light platforming.
The extended length of the blue character introduces a new mechanic. Some switches can only be flipped by the appropriate length, which the blue brick now possesses. At the start of Chapter 18, the blue character needs to sit on this switch and flip it to the other side to open the game.
After that, you’ll do some simple platforming, and that’s it for the chapter.
Chapter 19 is essentially one puzzle. First, you need to use the rotating platform on the top side to reach the higher platform and detach the yellow brick to bring the structure down.
Head back to the main platform and then activate the switch using the Blue brick by flipping it. This will activate the lower rotating platform.
Now, both of you can jump onto the lower rotating platform, followed by the dropped structure, and make your way forward.
Chapter 20 is only a series of simple platforming sections.
In Chapter 21, you need to first use one of the loose bricks to set the yellow switch in place. This will create a platform that you need to build upon, which will eventually catch bricks.
Flip the switch so that the machine starts throwing out loose bricks.
The platform you’ve created is supposed to catch these. Once you have enough, use those to create a path ahead to reach the higher platform.
During Chapter 22, you will both go through a series of platforming sections largely set on conveyor belts. Avoid the crushers, as those turn regular bricks into non-attachable bricks and will force you to respawn.
Eventually, you’ll make your way down to a section where you need to create a path forward. Here, the crusher can be enabled or disabled using the switch that can be operated by the blue character.
First, let a few bricks fall at the start of the belt on the left side and then stop the crusher.
Since these bricks aren’t crushed, you can pick them up and use them to create a path forward.
During Chapter 23, you’ll need to gather a few bricks from the conveyor belt on the left and create a structure on the movable platform.
This will pass through the obstacles in the path and then create a structure for one of the characters to reach the second switch.
The camera is the biggest challenge here because it’s almost entirely zoomed in on the character controlling the initial switch to move the platform.
Once one of the characters reaches the other side, they can control the platform now, allowing the other player to join them.
In Chapter 24, you’ll see a large conveyor belt and a yellow switch to its side. Remove the red brick from the switch and slide it all the way to the left. This will increase the speed of the belt by a considerable amount.
Now, one of you can get on the belt and fly to the other side, where you can activate the platform for the other player to cross.
Once you’re on the other side, use some loose bricks to create a platform and grab the power brick from the higher platform.
Use the power brick to open the gate and continue on.
After that, it’s a bit of platforming, and you’ll need to attach to these triangular bricks to be picked up by the magnetic rotor-type part on the conveyor belt.
Chapter 25 has what I think is the trickiest puzzle so far. There are two conveyor belts supplying different types of bricks, and you need to release a bridge on the left platform, but you can’t get there on your own.
So, here is how this works. The parts on the right-most conveyor belt can be picked up by the magnet, so let’s assume these are metallic. One of the players needs to control their direction and intensity accordingly. First, pick up a few metallic bricks on the right-most belt and then carry those along with the player’s brick using the magnet to the conveyor belt in the middle.
Drop them by reducing the magnetic intensity, and then the player needs to pick up a few loose bricks while they’re at it. You should now have a mix of metallic and regular bricks.
Now, activate the magnet again and carry the player along with the bricks to the last platform. They can now activate the bridge so both players can get on the platform.
After that, create a path using the loose bricks to move to the next area.
Chapter 26 starts off with some light platforming again, and it’s pretty easy to get through.
You will eventually get to a section where four platforms switch orientation when controlled by a switch. Every time one of the characters flips the switch, there are three green blinks, and the platforms change orientation.
The easiest way to keep track of the orientation switch is to count the blinks. After three blinks, jump!
During this section, you need to first lower the switch so one of you can go past the lowered platforms.
Grab a brick from ahead and wedge it on the switch so you can both get past this section.
Now, from the bottom right conveyor belt, grab a metallic brick and bring it close to the upper end of the platform where you see the magnet claw thing swing by.
Now, you both need to latch on to the metallic brick and then allow the magnet to carry from you, left to right, to the conveyor belt on the top right section. Make sure the magnet is coming in from the left side.
Once you’re on this conveyor belt, head down to the first conveyor belt with the metallic parts and use a loose brick from before to wedge the switch so both of you can pass.
Now, grab a bunch of loose bricks and make your way to the middle platform again, the one where the magnet is swinging around. Using the loose bricks, create a path forward!
Use another loose brick to wedge the next switch, and that’s the end of the chapter.
In Chapter 28, you jump on the train and enjoy a small ride.
Chapters 29 and 30
Okay, in this section, you will see a vehicle that has controls similar to the boat from early on. So, if you’ve made it this far, you know how annoying that was to control. This is even worse. So my advice? Don’t use this at all; you can do this section completely without interacting with that horrid machine.
This is a large, drawn-out section, but it’s very simple. There is one machine that turns the clay colored bricks into rail pieces, which are required for the train to move forward.
You get the clay-colored bricks from these mining belts around the area.
Just take them to the machine from earlier, which is in the west of this section. Insert them on the right and see the rail parts come out from the left.
Take these back to the train track and fix the thing up. Again, you really don’t need that dreaded vehicle and waste time like I did.
Once the track is fixed, get back on the train by jumping on the platforms to its left.
Chapters 31 and 32
After the train ride has resumed and ended, you’ll end up at a spot where the drone finally meets its untimely demise.
Bad for the drone, but good for us because we need its light piece. Equip that and enter darkness! Here, you’ll have to follow the green lights while using the little light provided by the drone.
Now, most of the section next involves light exploration, interaction with different rocket-related machines, and elevators.
There are no puzzles here, and you’ll get through it easily. You will be designing the rocket here, though, so take your time!
Okay, this is probably the one section in the entire game where there is a massive difficulty spike, and it’s because of one test. This is essentially a training room where you will be tested on various aspects to ensure you’re ready for space travel. Here is each training test, which you can approach in any order, but you need to complete all six:
In most tests, the red character will be operating something, while the blue character is being tested. This is one very simple. The red character must sit in the operating chair, while the blue character is inside the machine. It will spin for a few seconds before all lights are green.
For the second test, you need to first activate the timer in the middle of the training hall. After that, get on the small vehicle together and maneuver it around, crossing all three red lines to complete it. One of you will thrust forward, while the other can thrust sideways. It’s pretty simple.
This test is the only major difficulty spike in the entire game and took me a lot of time to complete. One of you needs to control the thrusters of the model rocket, while the other has to change directions. You need to land the rocket on the landing pads one by one and make sure it doesn’t hit anything else in the process.
My main tip for this is to first thrust the rocket high enough and slowly bring it down, changing the direction during that time. You will continue thrusting a little bit while making sure the direction is perfect. It’ll take a lot of trial and error, but you’ll get there eventually.
In the fourth test, you need to create a path for the blue character in the water. You can do this by using the loose bricks and setting them on the model structure on the left. It should look like this:
Once the Blue character has reached the end, they need to hop back into the rocket.
HUGE WARNING: During this puzzle, make sure the blue character doesn’t fall out of the rocket while they’re floating on water. There is no way to get back in, and you’ll have to restart the entire checkpoint. It’s clearly bugged, and I hope it’s fixed soon!
On the far left side of the hall is a simple test where you need to hold down the switch and let go so the blue character sort of propels upwards. It’s pretty simple, and you need to do it three times.
Finally, for the last test, you need to use the loose bricks to create a simple structure that avoids the blue character from falling off the chair while the large fan is active.
After you’re done with all six tests, you can move on to the next area!
In Chapter 34, the blue character will suit up and prepare for space travel. It’s pretty straightforward.
In this section, players need to repair a few parts of the rocket submerged in water. Whenever you see air bubbles from a part, that’s what needs to be repaired, which comes down to moving switches. The red player must create paths for the blue character using the platform.
Keep in mind, you can create elevated paths as well, making it easier for the blue character to jump and repair things.
Chapters 36 and 37
The last two chapters are completely story-based, and you don’t need to solve any puzzles.
That brings us to the end of our Lego Voyagers walkthrough. This is a fun co-op adventure filled with creative puzzles that aren’t too stressful and encourage players to work together.
If you’d like to see more helpful guides, news, or features from Prima Games, please consider adding us to your preferred sources (available to users in the US or India).