Photo editing can get messy fast, it certainly does for me. I reach for one app for cropping, another for filters, another for retouching, and before I know it, my work is scattered across my desktop. Not to mention file storage — I have image duplicates and editing iterations in almost every folder. I thought that hoarding photo editing apps would give me more and better options, but it only ended up complicating things. Something had to give.
After I simplified my text editing with this lightweight plain text stack, I thought, why not try the same for my images? An “industry standard” or sprawling editing toolbox isn’t exactly necessary for someone who isn’t a professional photographer, so I started cutting back and removing the noise. What I ended up with was a handful of small but powerful editors, a clean and streamlined folder structure, and a simple way to keep everything synced and backed up. Here’s my new system…
The image editors I use now
A combo of native and browser-based image editors
The first step was to narrow down my image editing stack. I’ve tried them all, from pricey proprietary tools like Photoshop to barebones open-source alternatives like Photoflare. And I usually end up enjoying most of them. The problem is, more apps mean more images and edits to keep track of. So I had to simplify.
Native desktop apps are overlooked in my opinion. Yes, I’m talking about Windows Photos. I use it almost every day to crop the featured images for my articles, but I started playing around with its other features and was pleasantly surprised. It has a decent slider selection for things like brightness and saturation. The sharpening feature is also not bad. And what I love most is one of the more recent additions — Erase. There’s usually a speck of dust or a little crack in a wall to get rid of, so having an effective, and free, magic eraser is beyond handy. If you’re using a different OS, I recommend Apple Photos or Google Photos.
As for image resizing and conversion, I just stick with the good ol’ MS Paint app. It’s also native to Windows computers, so yet another win for simplicity. I’ve been using the Paint resizer tool for years now, it’s really convenient. And you can also convert your image via the export function — super handy for getting the right format in seconds. Paint also has some other useful nuggets for more creative graphics work, such as its paintbrush, fill bucket, and shapes.
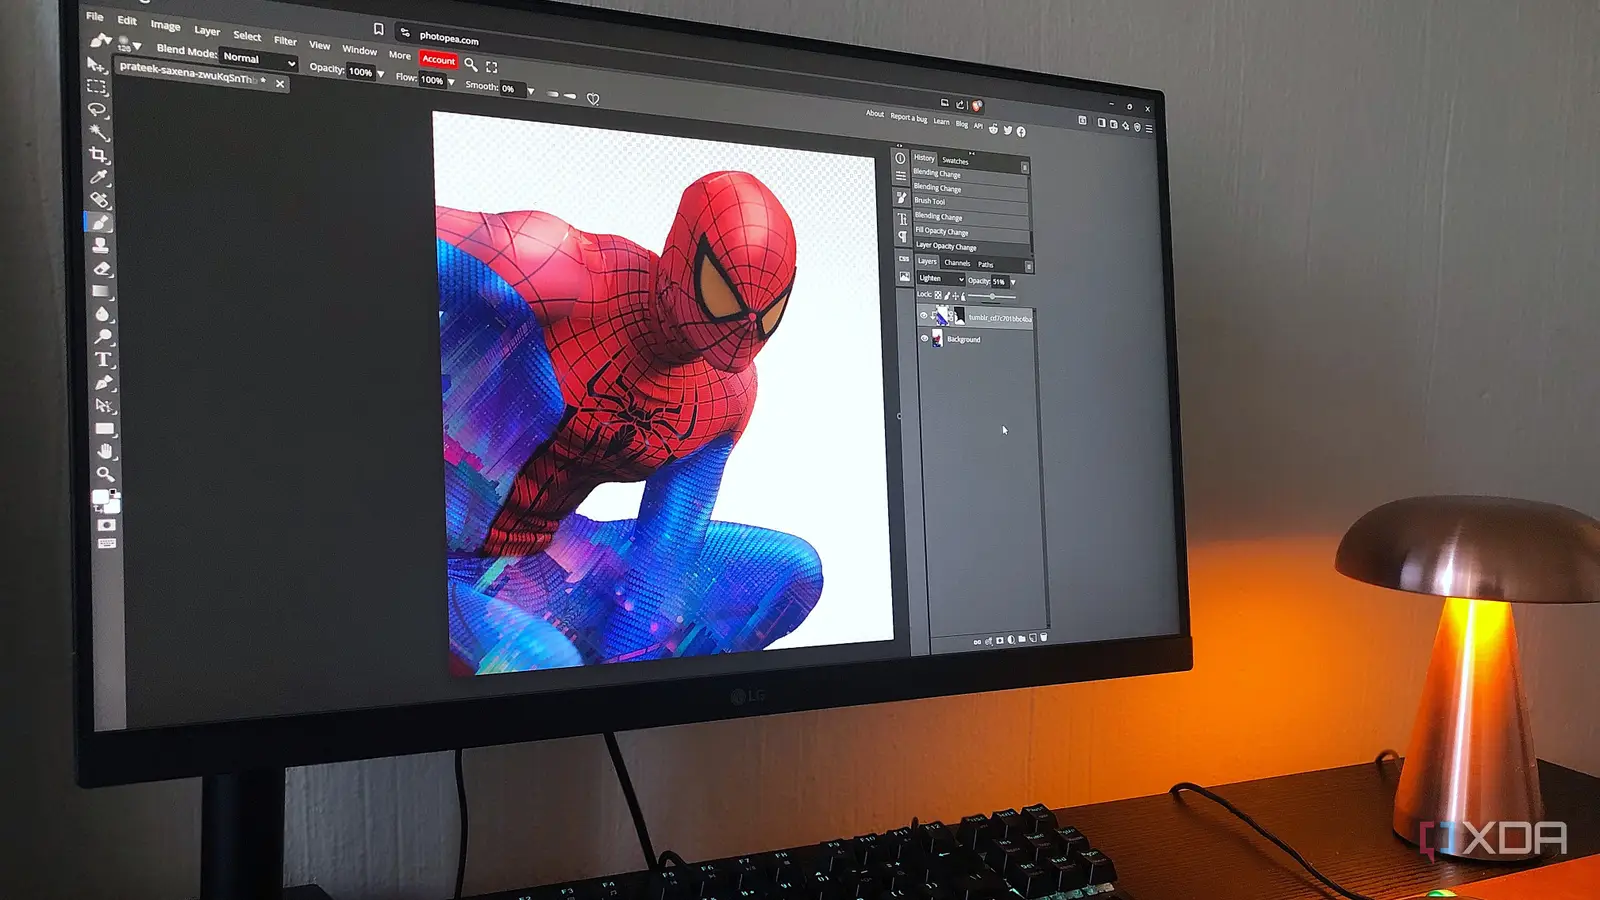
Lastly, I still need at least one editor that’s a little more advanced. For this, I’m sticking with Photopea. This browser-based editor is a mirror of Photoshop, except it’s free and a bit easier to navigate. It really is a multi-tool that goes beyond basic image editing. It supports smart objects for complex composites and has a massive range of tools like brushes and selections; you can create pretty much anything with it. Photopea is what I turn to for any image that needs more than a simple filter. Think text overlays, double exposures, texture editing, skin retouching, sky replacement, background removal, and so on. If browser apps aren’t your thing, I recommend GIMP, it’s a very advanced (and open-source) image editor.
My folder system
Keeping things organized
Editing an image is just one part of it; organizing your edited images is what will make or break the stack. For me, a reliable folder structure was nonnegotiable if I wanted something that sticks. I used the PARA system (Projects, Areas of responsibility, Resources, Archives) for my plain text stack and that worked out seamlessly, so I wanted something similar that would be suitable for image files. Here’s what I came up with:
Creative – Images that I heavily edited for creative projects.
Family – Shots of myself and friends and family.
Headshots – Professional photos.
In Progress – Images that need to be edited.
Old – Photos I rarely view but still want to keep.
Socials – Shots that have gone or are going up on my social media accounts.
Trips – Anything related to travel.
Within these folders, I create a subfolder for each year to make everything easier to keep track of. Within some of these subfolders, I have more subfolders to sort the images by theme, for example, Halloween and Christmas of 2024.
Backup and sync
I keep it as simple as possible
I shoot most of my images on my phone, and to get them onto my computer, I use Snapdrop. It’s incredibly fast and convenient, kind of like Airdrop for those who are in the Apple ecosystem. To move images between my Chromebook and PC, I use Syncthing, an open-source file syncing app. And to back everything up, I simply add my photos folder to sync on the Google Drive app. There are a million more privacy-focused apps you can use for this, like Nextcloud, but this setup is what works best for me since I prefer opting for convenience.
Quality over quantity
This setup is by no means fancy, but that’s the point. I just need something to get my photos into good shape, keep them organized, and back them up. By stripping things down this way, I ended up with an editing system that’s fast, lightweight, streamlined, and reliable.